SEO title: AI Podcast Editors Compared by the Job You Need to Finish Meta description: The right AI podcast editor depends on your output. This comparison covers full episodes, separate microphones, multicam interviews, captions, and short clips.
AI Podcast Editors Compared by the Job You Need to Finish
Quick summary
The best AI podcast editor depends on the handoff you need at the end. Choose by whether you are cleaning a full episode, preserving separate microphones and cameras, or turning one conversation into publishable clips. Test one interruption or repeated answer from your own recording before you commit to a plan.
Podcast tools overlap on transcripts and automatic cleanup, but they do not solve the same production problem. A host making a clean audio episode needs different controls from a team delivering a two camera interview, and a clips specialist may care more about selection and reframing than a full episode timeline. Start with the deliverable that would be hardest to rebuild.
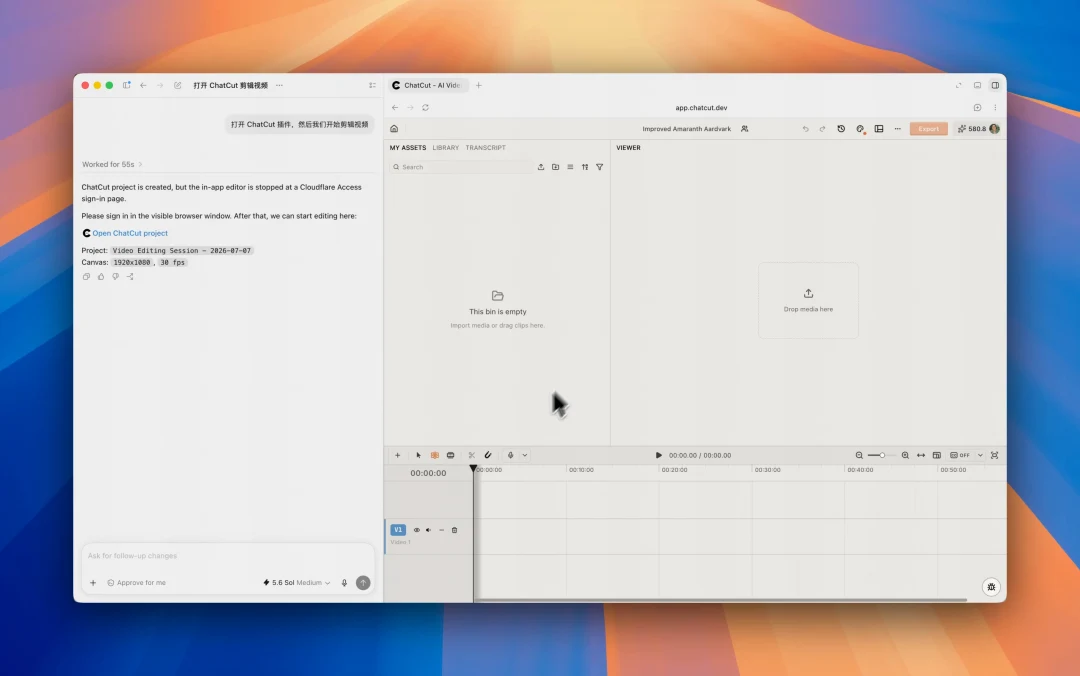
For a fair first check, bring a short section with a real interruption, a repeated answer, and the separate audio or camera tracks you normally receive. In ChatCut, open a project, import that sample, and ask, “Remove the abandoned answer, keep the qualification, preserve the separate microphone tracks, and leave the timeline editable.” Play the result and inspect the speaker layout before you compare tools on features or price.
Choose the podcast job before you choose a tool
The tools overlap on transcripts, automatic cleanup, captions, and short clips, but they begin in different places. Descript starts with a document, FireCut starts inside a professional host editor, Riverside starts with the recording session, Wisecut starts with an automated first pass, and OpusClip starts with a finished long video. ChatCut starts with an editable project and lets you describe a change in natural language before checking the transcript, timeline, tracks, and output.
That difference matters more than a feature count. The same request, such as “remove the repeated answer and make a one minute clip,” travels through a different workflow in each product. Some tools make the transcript the main editing surface. Some run automation inside another editor. Some produce a set of social clips from a finished episode. The table below shows where the work starts and what you should test against ChatCut.
Tool
How the workflow works
How it differs from ChatCut
ChatCut
Import footage, describe the intended change, then review the transcript, timeline, tracks, captions, and export.
Project level editing with both natural language instructions and direct timeline control.
Descript
Import or record, edit the transcript as a document, then use Underlord for broader instructions and bulk changes.
Document centered editing; test how the instruction becomes a revisable project change.
FireCut
Run automation inside supported Premiere Pro or DaVinci Resolve projects for silence, captions, zooms, chapters, and podcast camera work.
Host dependent plugin workflow; the native NLE remains the project and review surface.
Riverside
Record guests with separate tracks, then edit the transcript, timeline, layout, audio, and clips in the same service.
Recording first; compare the source tracks available at capture with an imported ChatCut project.
Wisecut
Upload or paste a video, let the speech focused workflow create cleanup, reframing, subtitles, and highlights, then review the first pass.
More automated and speech centered; test how much control remains when the pacing is wrong.
OpusClip
Upload a long video or link, let ClipAnything find moments, then adjust captions, reframing, and social clip outputs.
Long video to short clip workflow; it is aimed at distribution from an existing episode rather than the whole multitrack edit.
Compare prices only after calculating the work you actually need: source hours, seats, AI actions, export allowance, and deliverables. A plan’s headline monthly price does not establish the cost of your finished episode.
For example, four 60 minute episodes mean four hours of source recording. If each also produces three one minute clips, the requested video deliverables total 252 minutes when the full episodes and clips are exported once. That is a workload calculation, not any service’s bill: some plans meter uploaded hours, some AI actions, and some rendered duration. Revisions add exports. Match each provider’s quota unit to the work before comparing prices.
How ChatCut and the other editors approach the same recording
The descriptions below use current provider material and the supplied homepage captures. They explain the advertised workflow and the decision it supports. They are not a matched quality, speed, or price test on the same recording.
ChatCut
ChatCut provides a transcript editor, a timeline with multiple tracks, and agent instructions for changes across a project. In Transcript, deleting words cuts their recorded range on the selected track. Content corrects visible captions. The transcript and caption controls guide explains the distinction. For a sample you can follow, the tutorial on editing video through its transcript takes a recording through text edits, timeline review, and export.
For separate cameras or recorders, AI multicam sync aligns clips with overlapping recognizable audio. It places or moves clips on separate tracks. It does not choose camera cuts automatically. Review a clear clap or phrase after synchronization and again after substantial edits.
Use ChatCut when the episode also needs captions, supporting shots, graphics, or several editable versions. If you want to make those edits inside ChatGPT, the ChatGPT video editing tutorial covers plugin installation, your first request, and the editable result. Check cloud export limits and any generation charges separately from core editing.
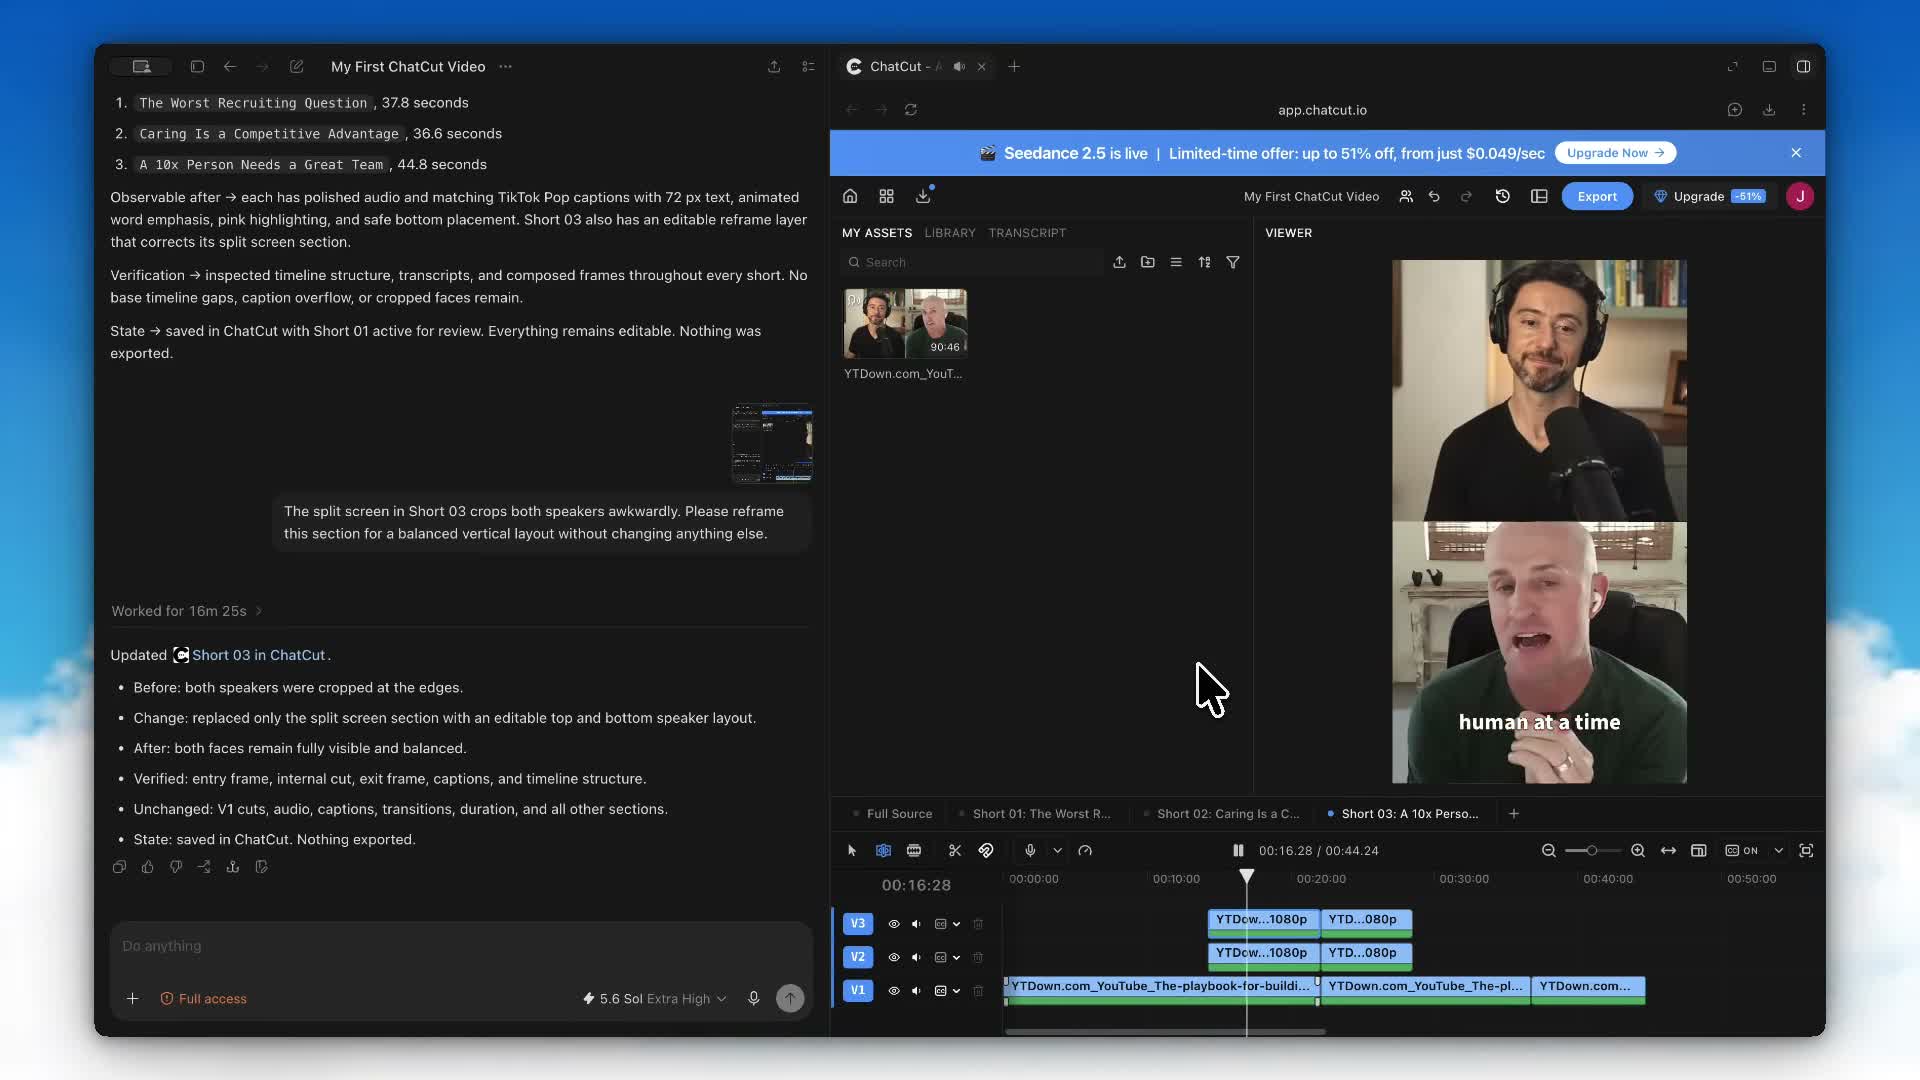
For a filmed podcast clip, test a composition you need to correct. This recorded case shows a two speaker reframe with separate V2 and V3 layers. Inspect both faces and caption placement. The response says “Nothing exported,” so this demonstrates a project correction.
Descript
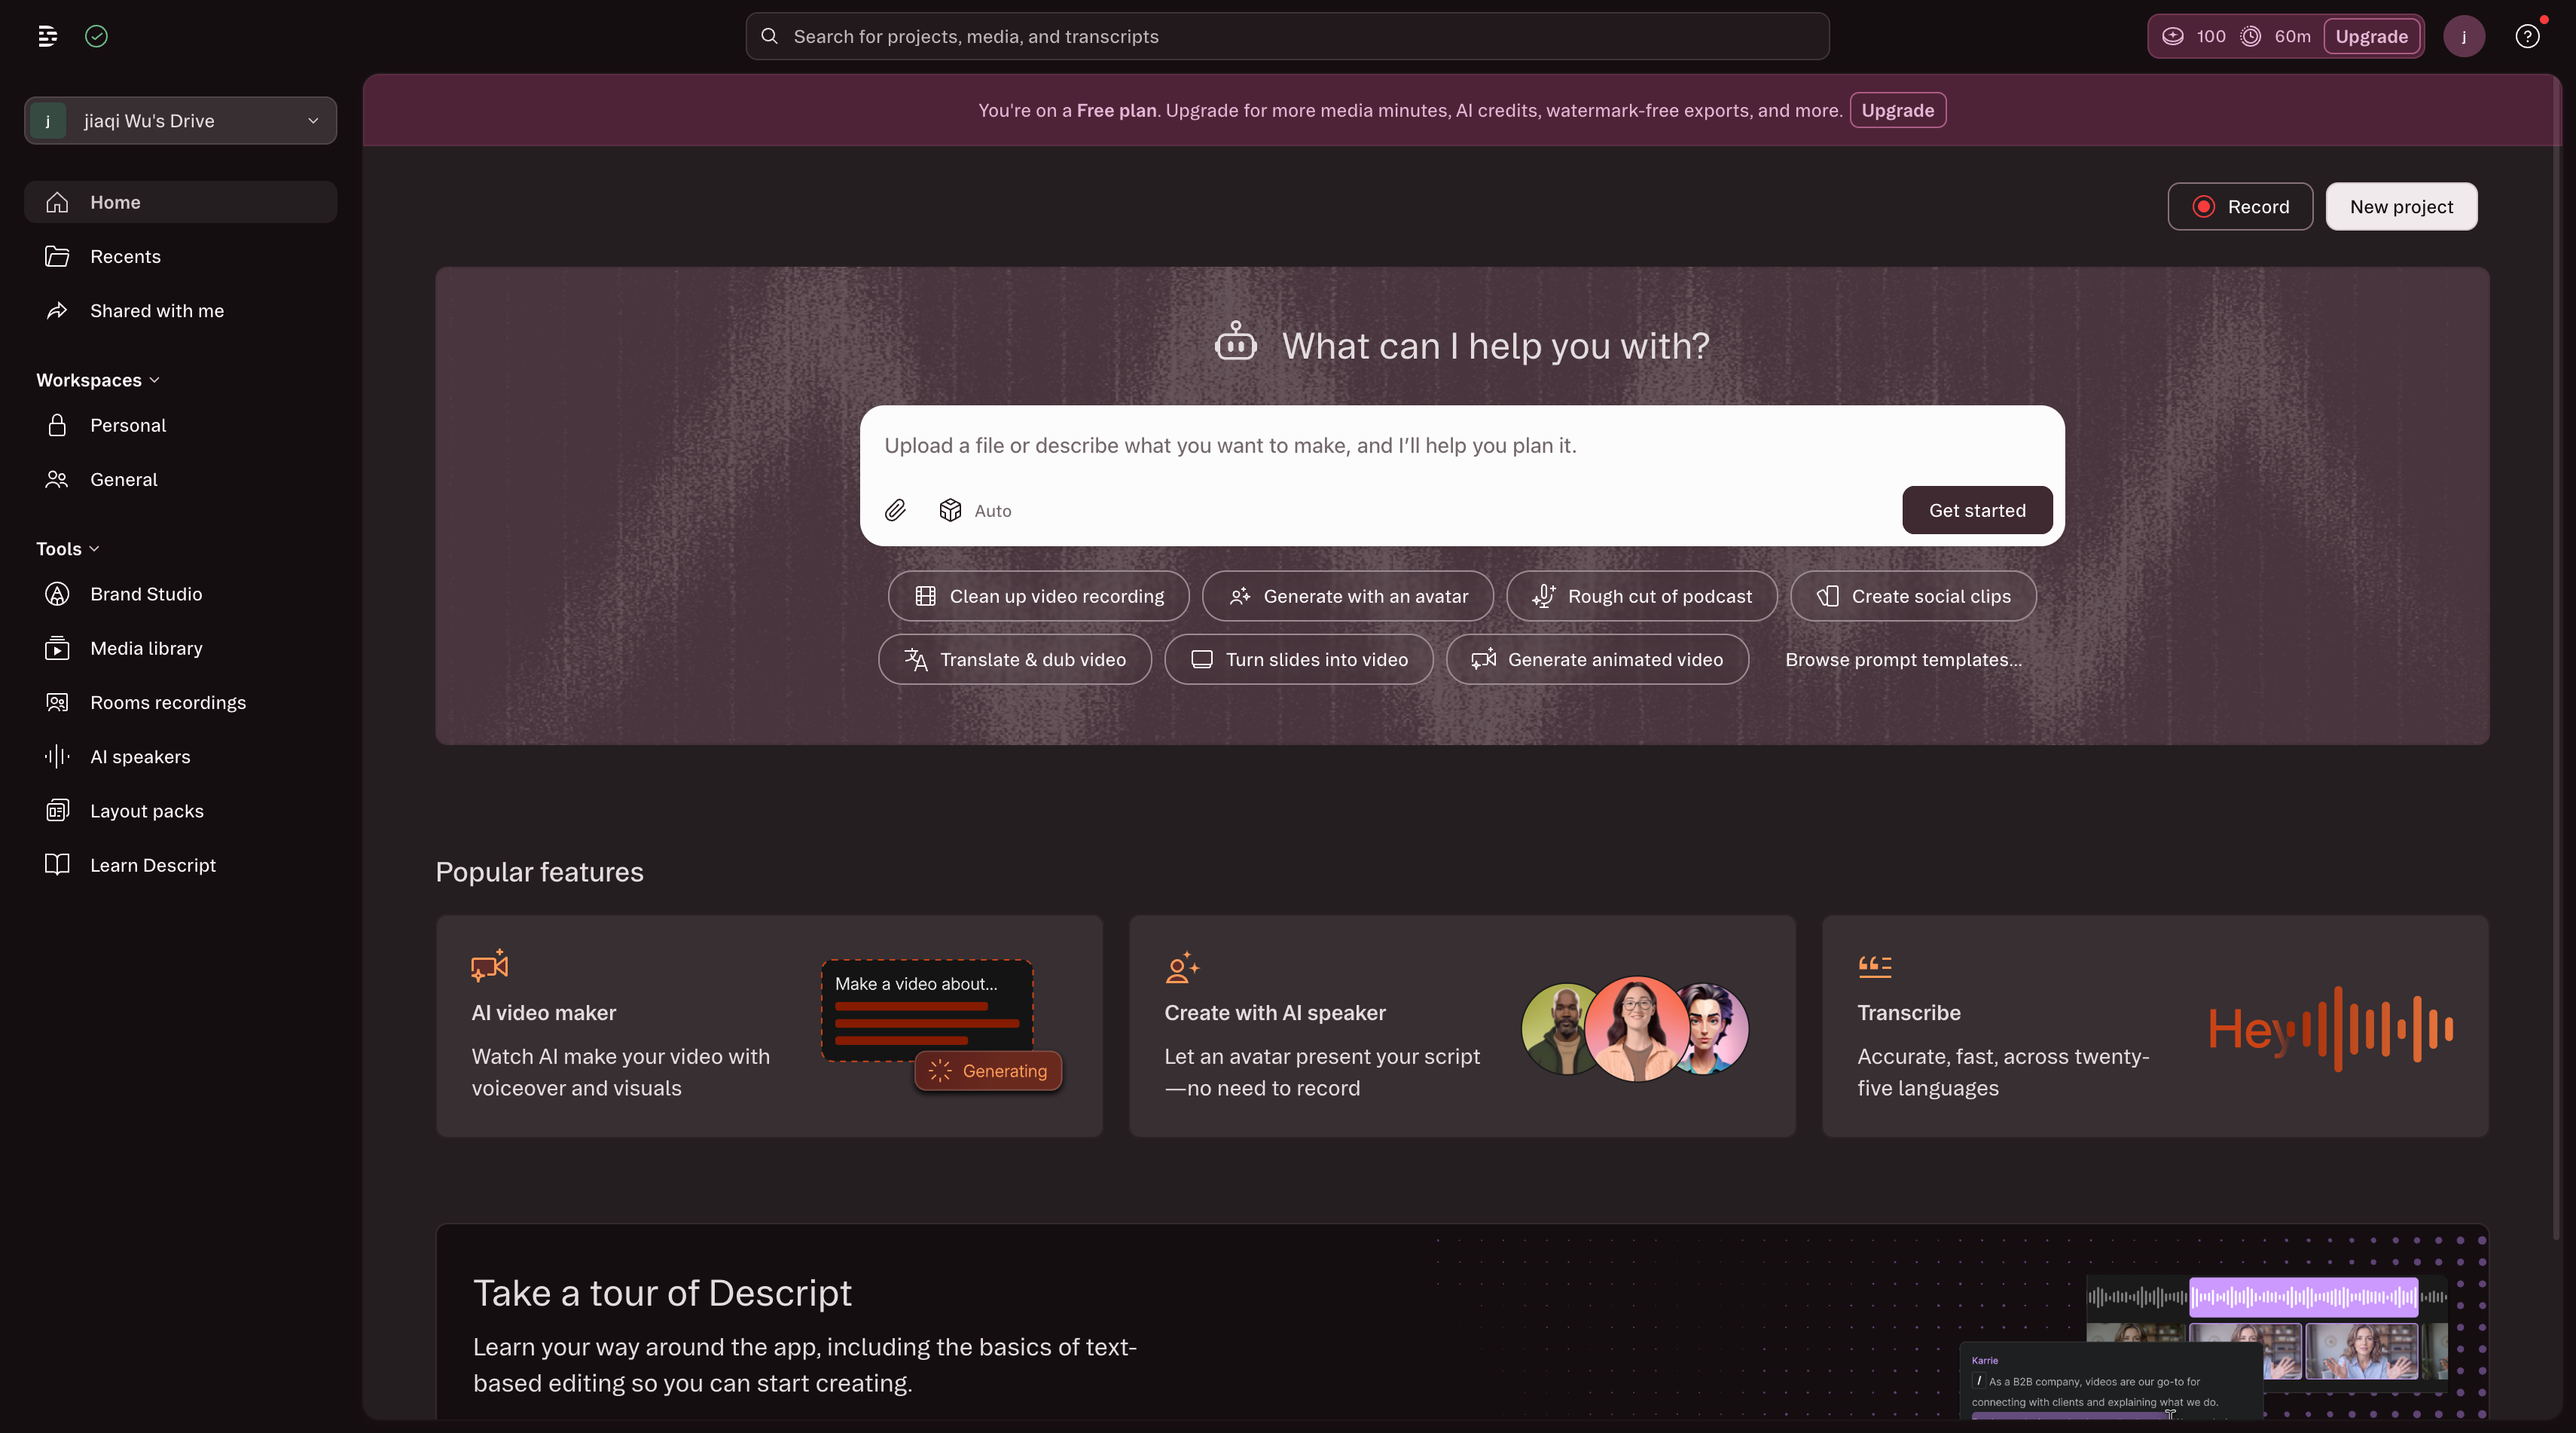
Descript is document centered. You import or record a project, correct the transcript as if it were a document, and let the corresponding video and audio ranges follow the text. Its Underlord adds an instruction layer for broader tasks such as bulk cleanup, filler removal, clip creation, and other project changes. The homepage presents that combination directly: an input where you can upload a file or describe what you want, prompt shortcuts for cleaning a recording or creating social clips, and a project workspace below. In practice, the path is upload or record, describe or choose the cleanup task, edit the transcript, and then refine the linked timeline before export.
That overlaps with ChatCut in two useful ways: both let you express an editing goal in ordinary language, and both keep transcript based edits connected to an editable project. The difference is the center of gravity. Descript makes the transcript document the primary editing surface. ChatCut keeps the transcript, multitrack timeline, captions, generated media, and agent instructions available as parts of one project. Choose Descript when document style editing is the part your team repeats most. Choose ChatCut when the same episode also needs track level corrections, generated shots, graphics, or several timeline versions.
Descript homepage capture. The visible entry point is “Upload a file or describe what you want to make,” followed by shortcuts for cleaning a recording, creating social clips, and other AI tasks. This shows the product’s advertised starting workflow, not a controlled edit of the same podcast used in this article.
FireCut
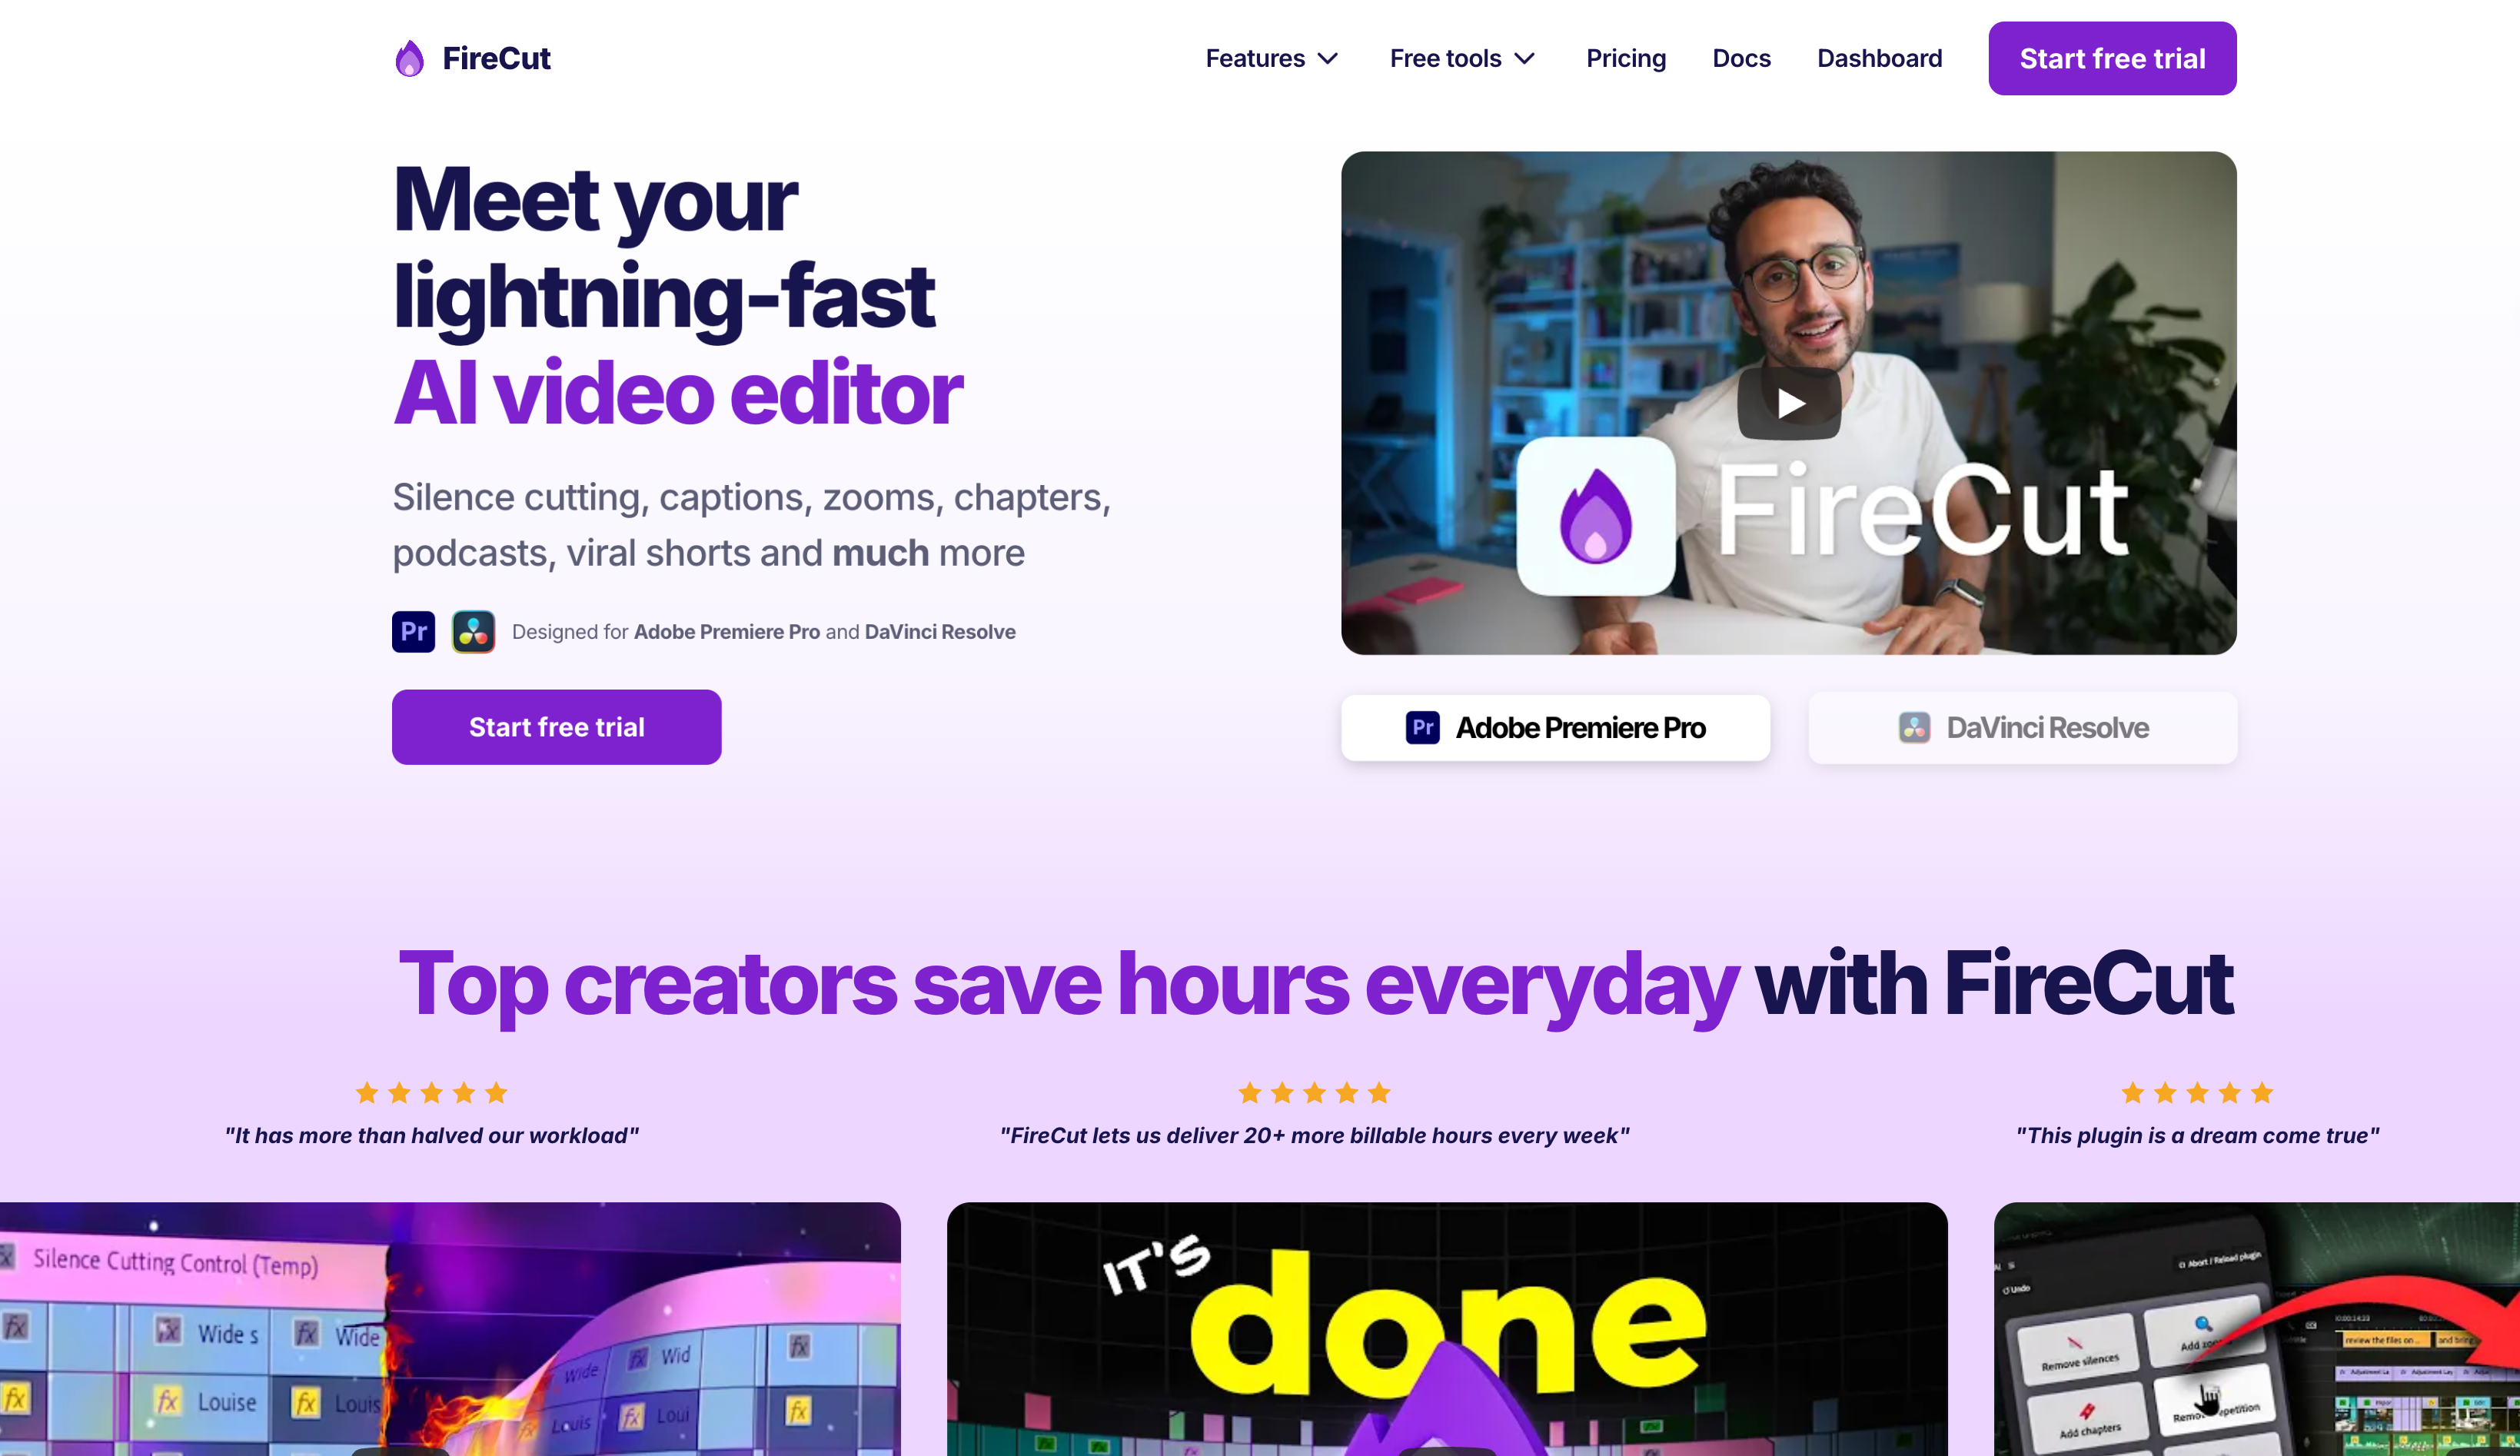
FireCut is a plugin workflow. You keep the production in a supported version of Premiere Pro or DaVinci Resolve, then use FireCut to automate recurring operations such as silence cutting, captions, zooms, chapters, and podcast camera edits. The host editor remains the place where you inspect the native project, change a cut, and finish the export. The working path is open the host project, run the selected automation, inspect cuts, markers, or captions in the native timeline, correct edge cases, and export from that host.
FireCut and ChatCut both target repetitive editing work, but they solve the handoff differently. FireCut adds automation to an NLE you already use. ChatCut is its own project environment with transcript, timeline, track, caption, and agent controls in the same workspace. FireCut is the practical choice when a team cannot leave Premiere Pro or Resolve. ChatCut is easier to compare when the starting material is a recording and the editor should carry out a plain language request without a separate host application. Verify the exact host version and integration before assuming that a FireCut feature behaves the same way in both supported editors.
FireCut homepage capture. The hero names Adobe Premiere Pro and DaVinci Resolve as the supported hosts and lists silence cutting, captions, zooms, chapters, and podcast features. The screenshot explains the integration model; it does not establish feature parity for every host version.
Riverside
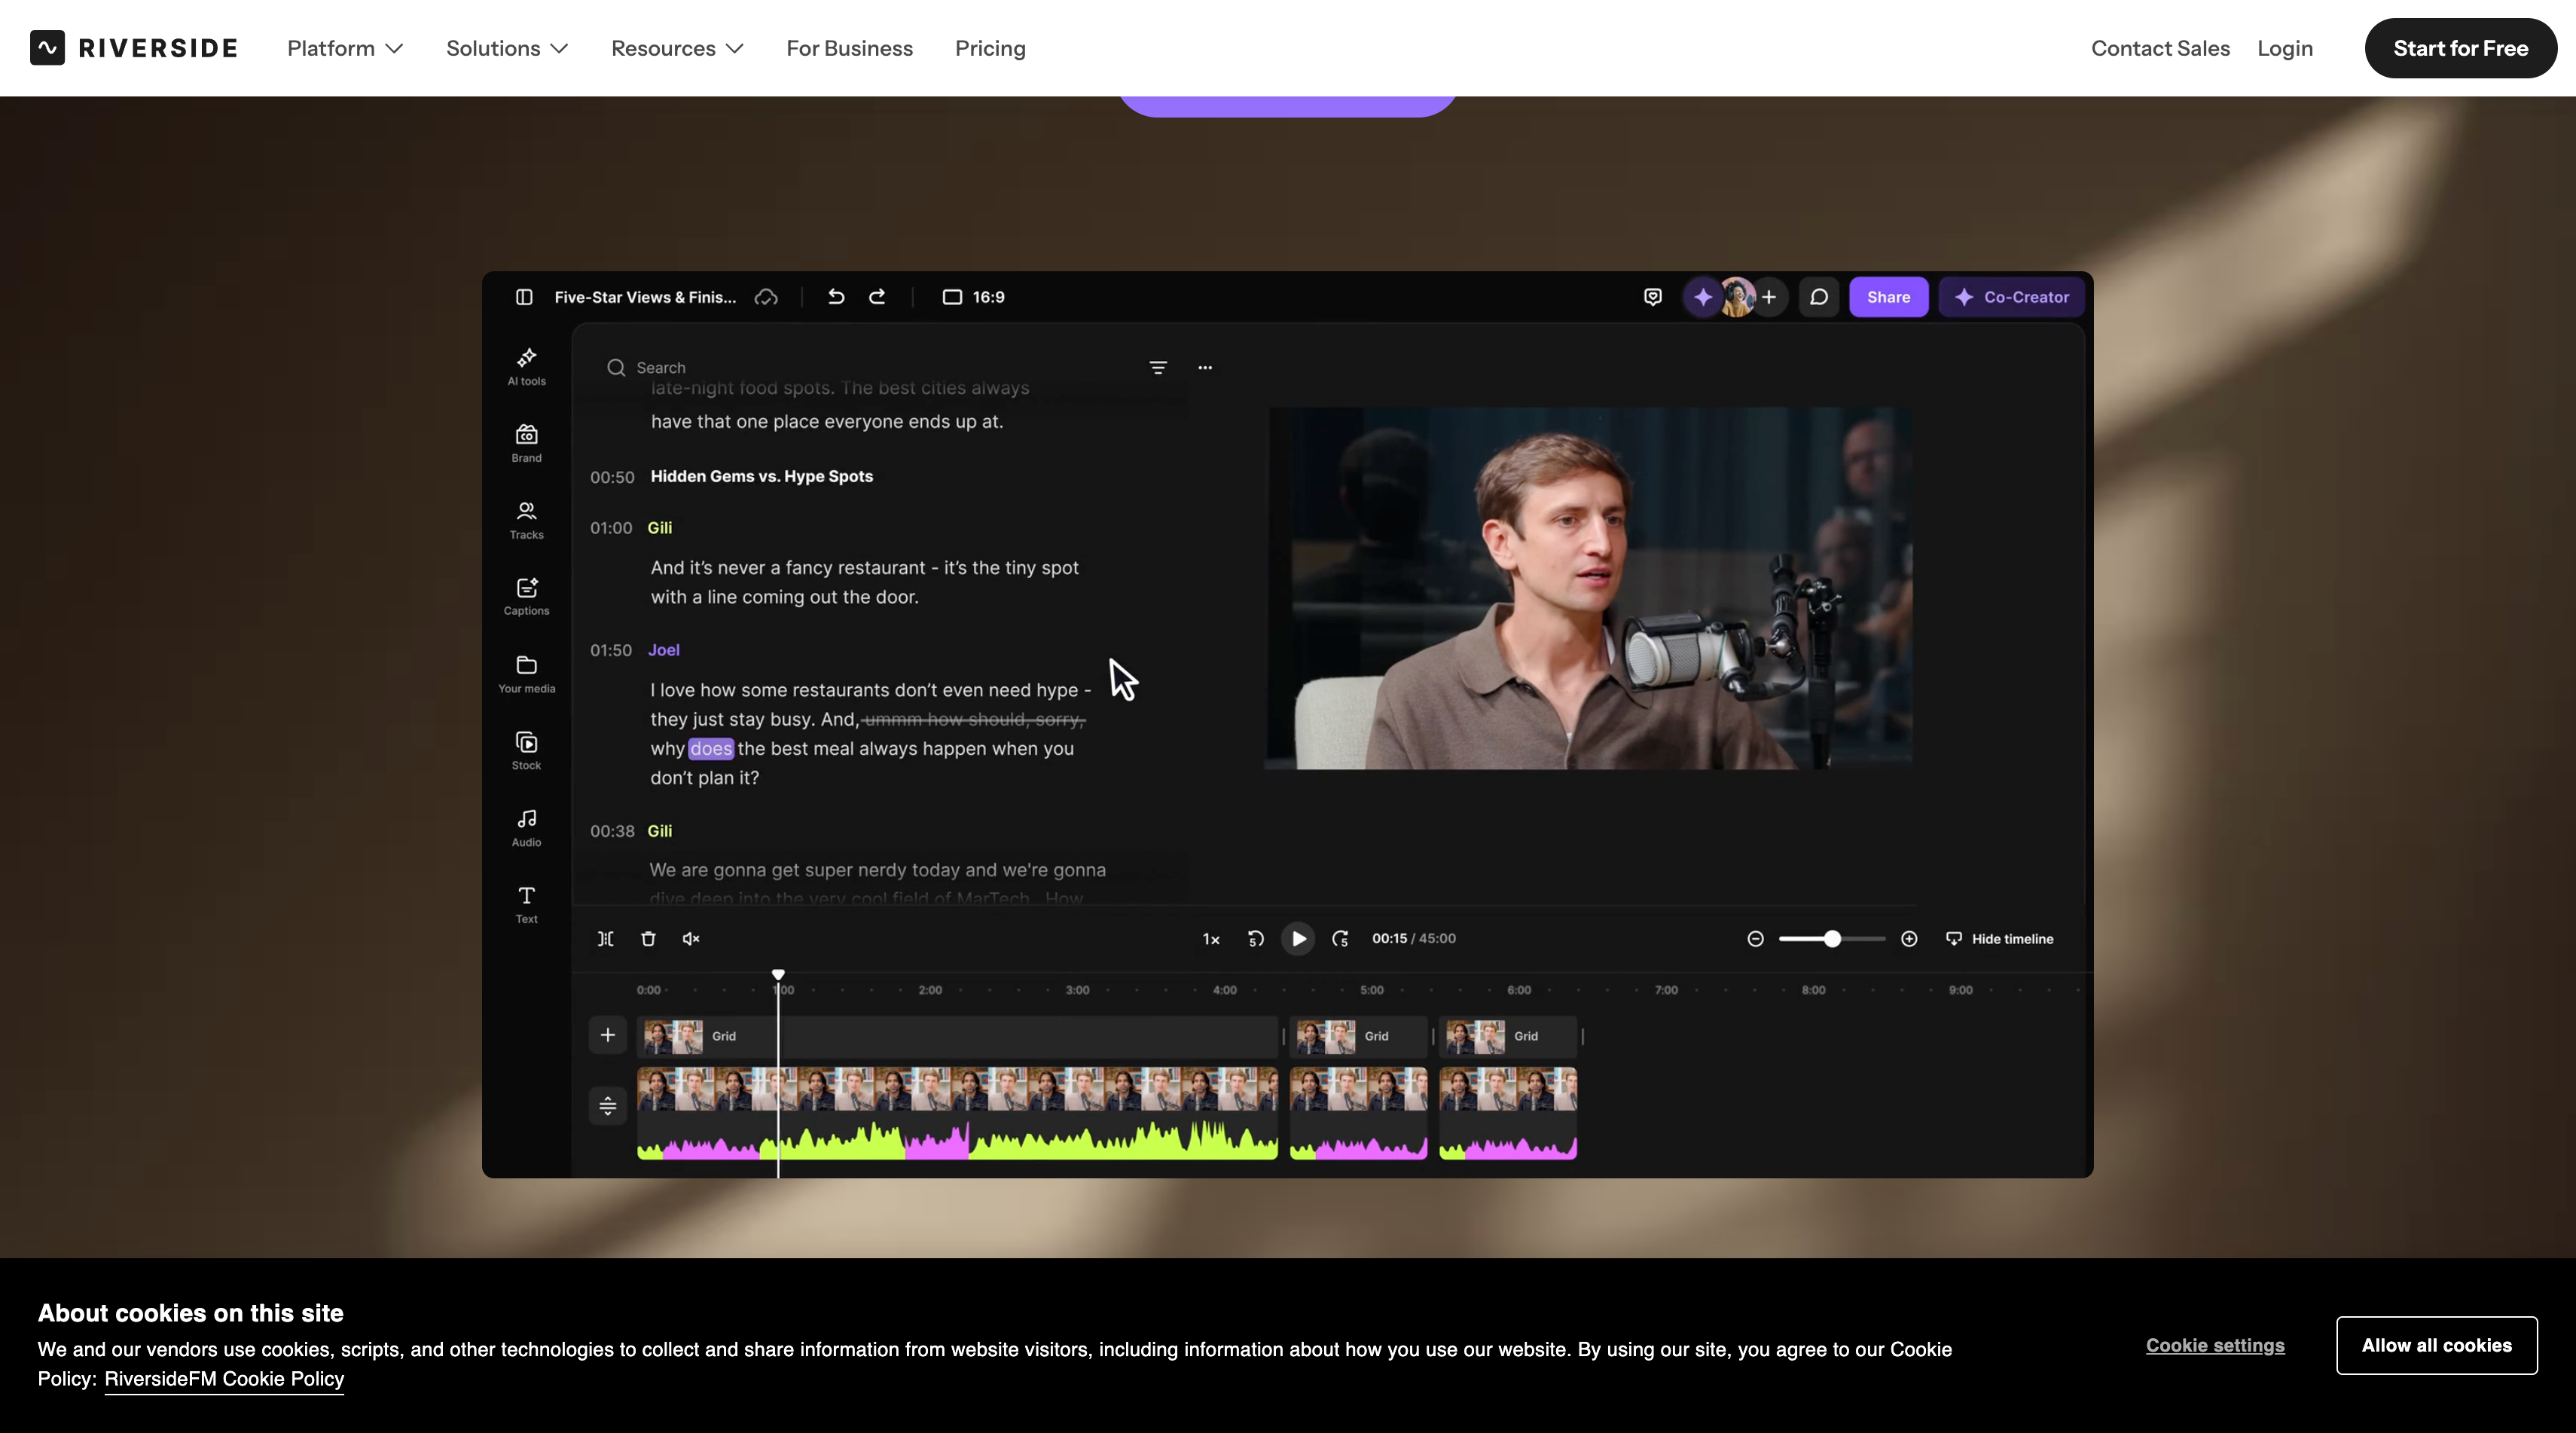
Riverside starts earlier in the workflow than the other tools in this list. You record a conversation with separate speaker tracks, then use the transcript, timeline, layout, audio, and clip controls to shape the episode. Its current editor material also describes agent instructions, so the service now combines recording, project editing, and guided automation instead of only handing files to another editor. The working path is record the conversation, wait for separate tracks, edit from the transcript, adjust layout and audio, make clips, and export the episode or clips.
The overlap with ChatCut is the editable conversation workflow: transcript changes, timeline changes, layout decisions, and instruction based assistance can sit beside the media. The difference is the source. Riverside can preserve the information created during the remote recording session, including separate speaker tracks. ChatCut is the more relevant comparison when you already have media and want to import, sync, edit, add captions or generated media, and keep the project adjustable. If you bring a mixed recording into Riverside or ChatCut, do not assume either service can recover microphone control that was never recorded separately.
Riverside homepage capture. The hero shows transcript text, a video preview, a timeline, and conversation editing controls in one view. It represents a recording and editing platform; use a real sample to verify what remains available after importing a mixed file.
Wisecut
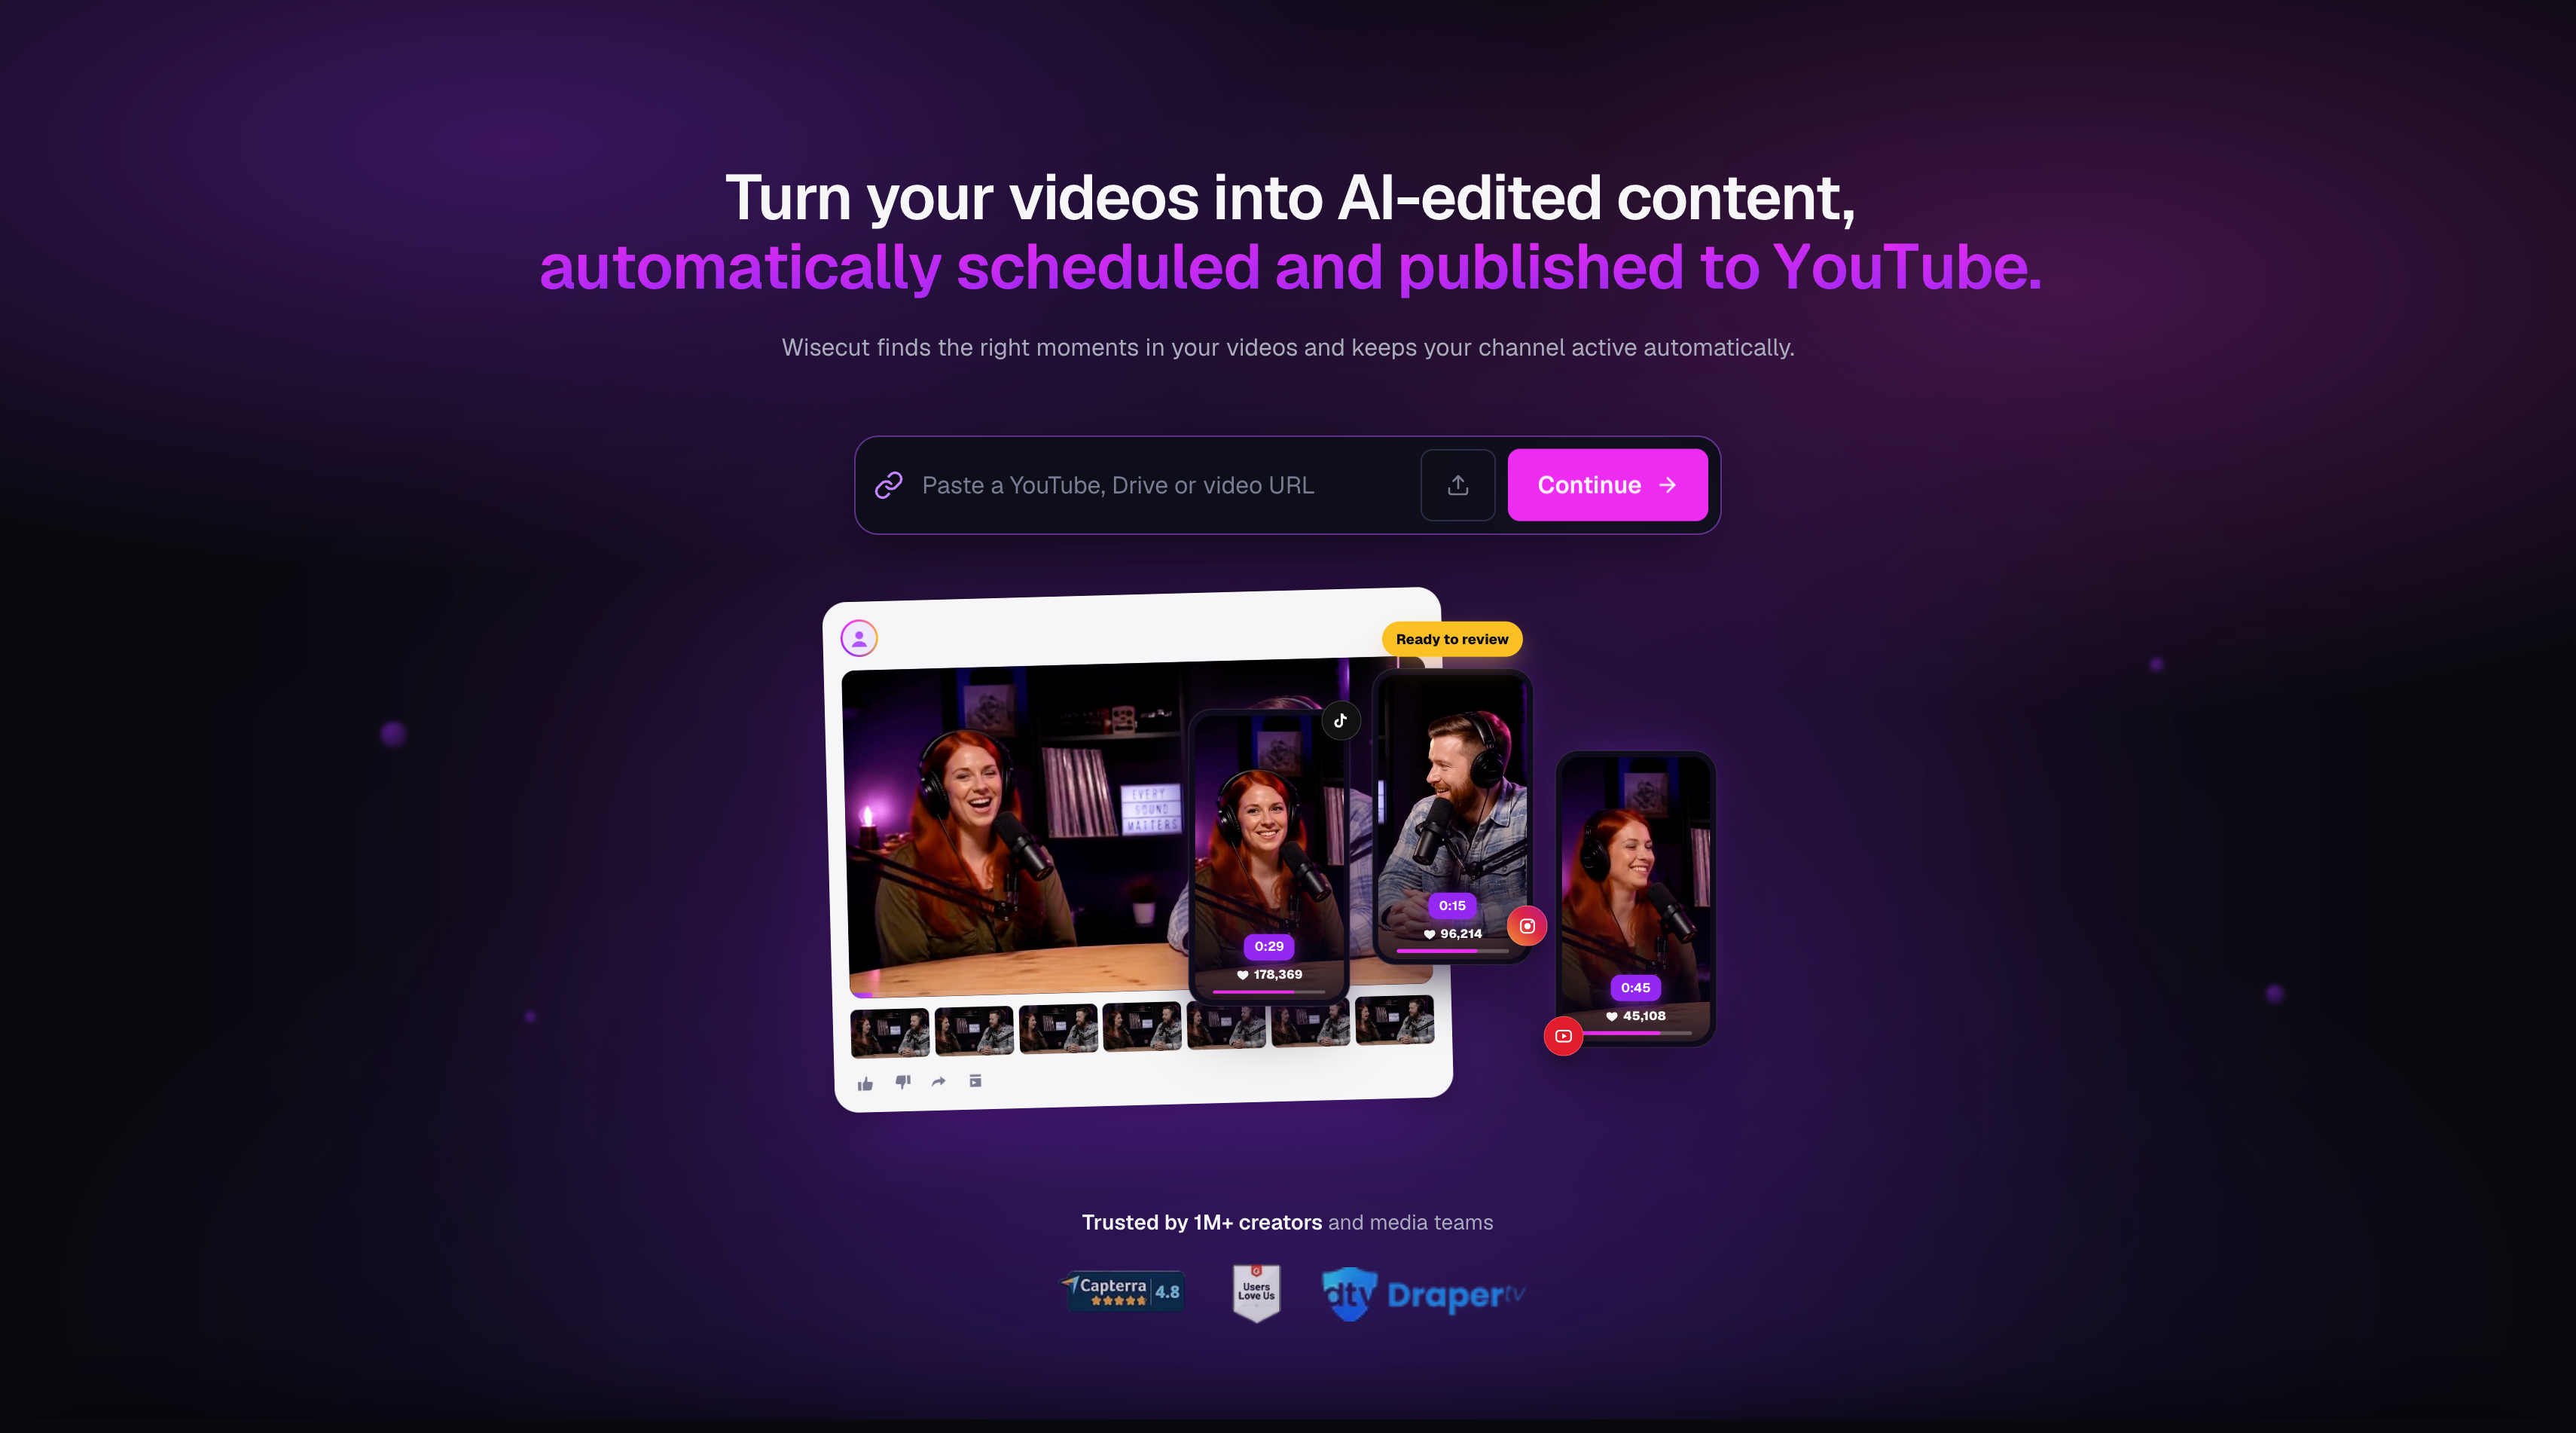
Wisecut is built around an automated first pass for speech led videos. The homepage workflow accepts a YouTube, Drive, or video URL, then presents AI edited content with highlights, reframing, subtitles, and publishing or scheduling options. Its WISH instruction layer gives the workflow a conversational surface, but the product’s main promise remains automatic cleanup and recurring distribution. The working path is paste a URL or upload a video, review the generated first pass, correct the moments or framing that need attention, and then publish or schedule the result.
That is similar to ChatCut’s ability to make a first pass from a clear request, especially when a talking head recording has obvious pauses or a social clip goal. The difference is how much of the edit you need to own afterward. Wisecut is attractive when the same cleanup and reframing pattern repeats across many speech led videos. ChatCut is a better fit when you need to inspect the transcript, change one phrase, preserve a pause, adjust a particular track, or continue into graphics and other project edits. Test a thoughtful pause and a speaker interruption, not only a clean single speaker clip. The guide to removing silence and filler words explains how to request cleanup and decide which pauses to keep.
Wisecut homepage capture. The entry field accepts a video URL, while the hero promises automatically edited, scheduled, and published content with multiple social previews. This supports a workflow comparison, not a claim about the quality of every automated cut.
OpusClip
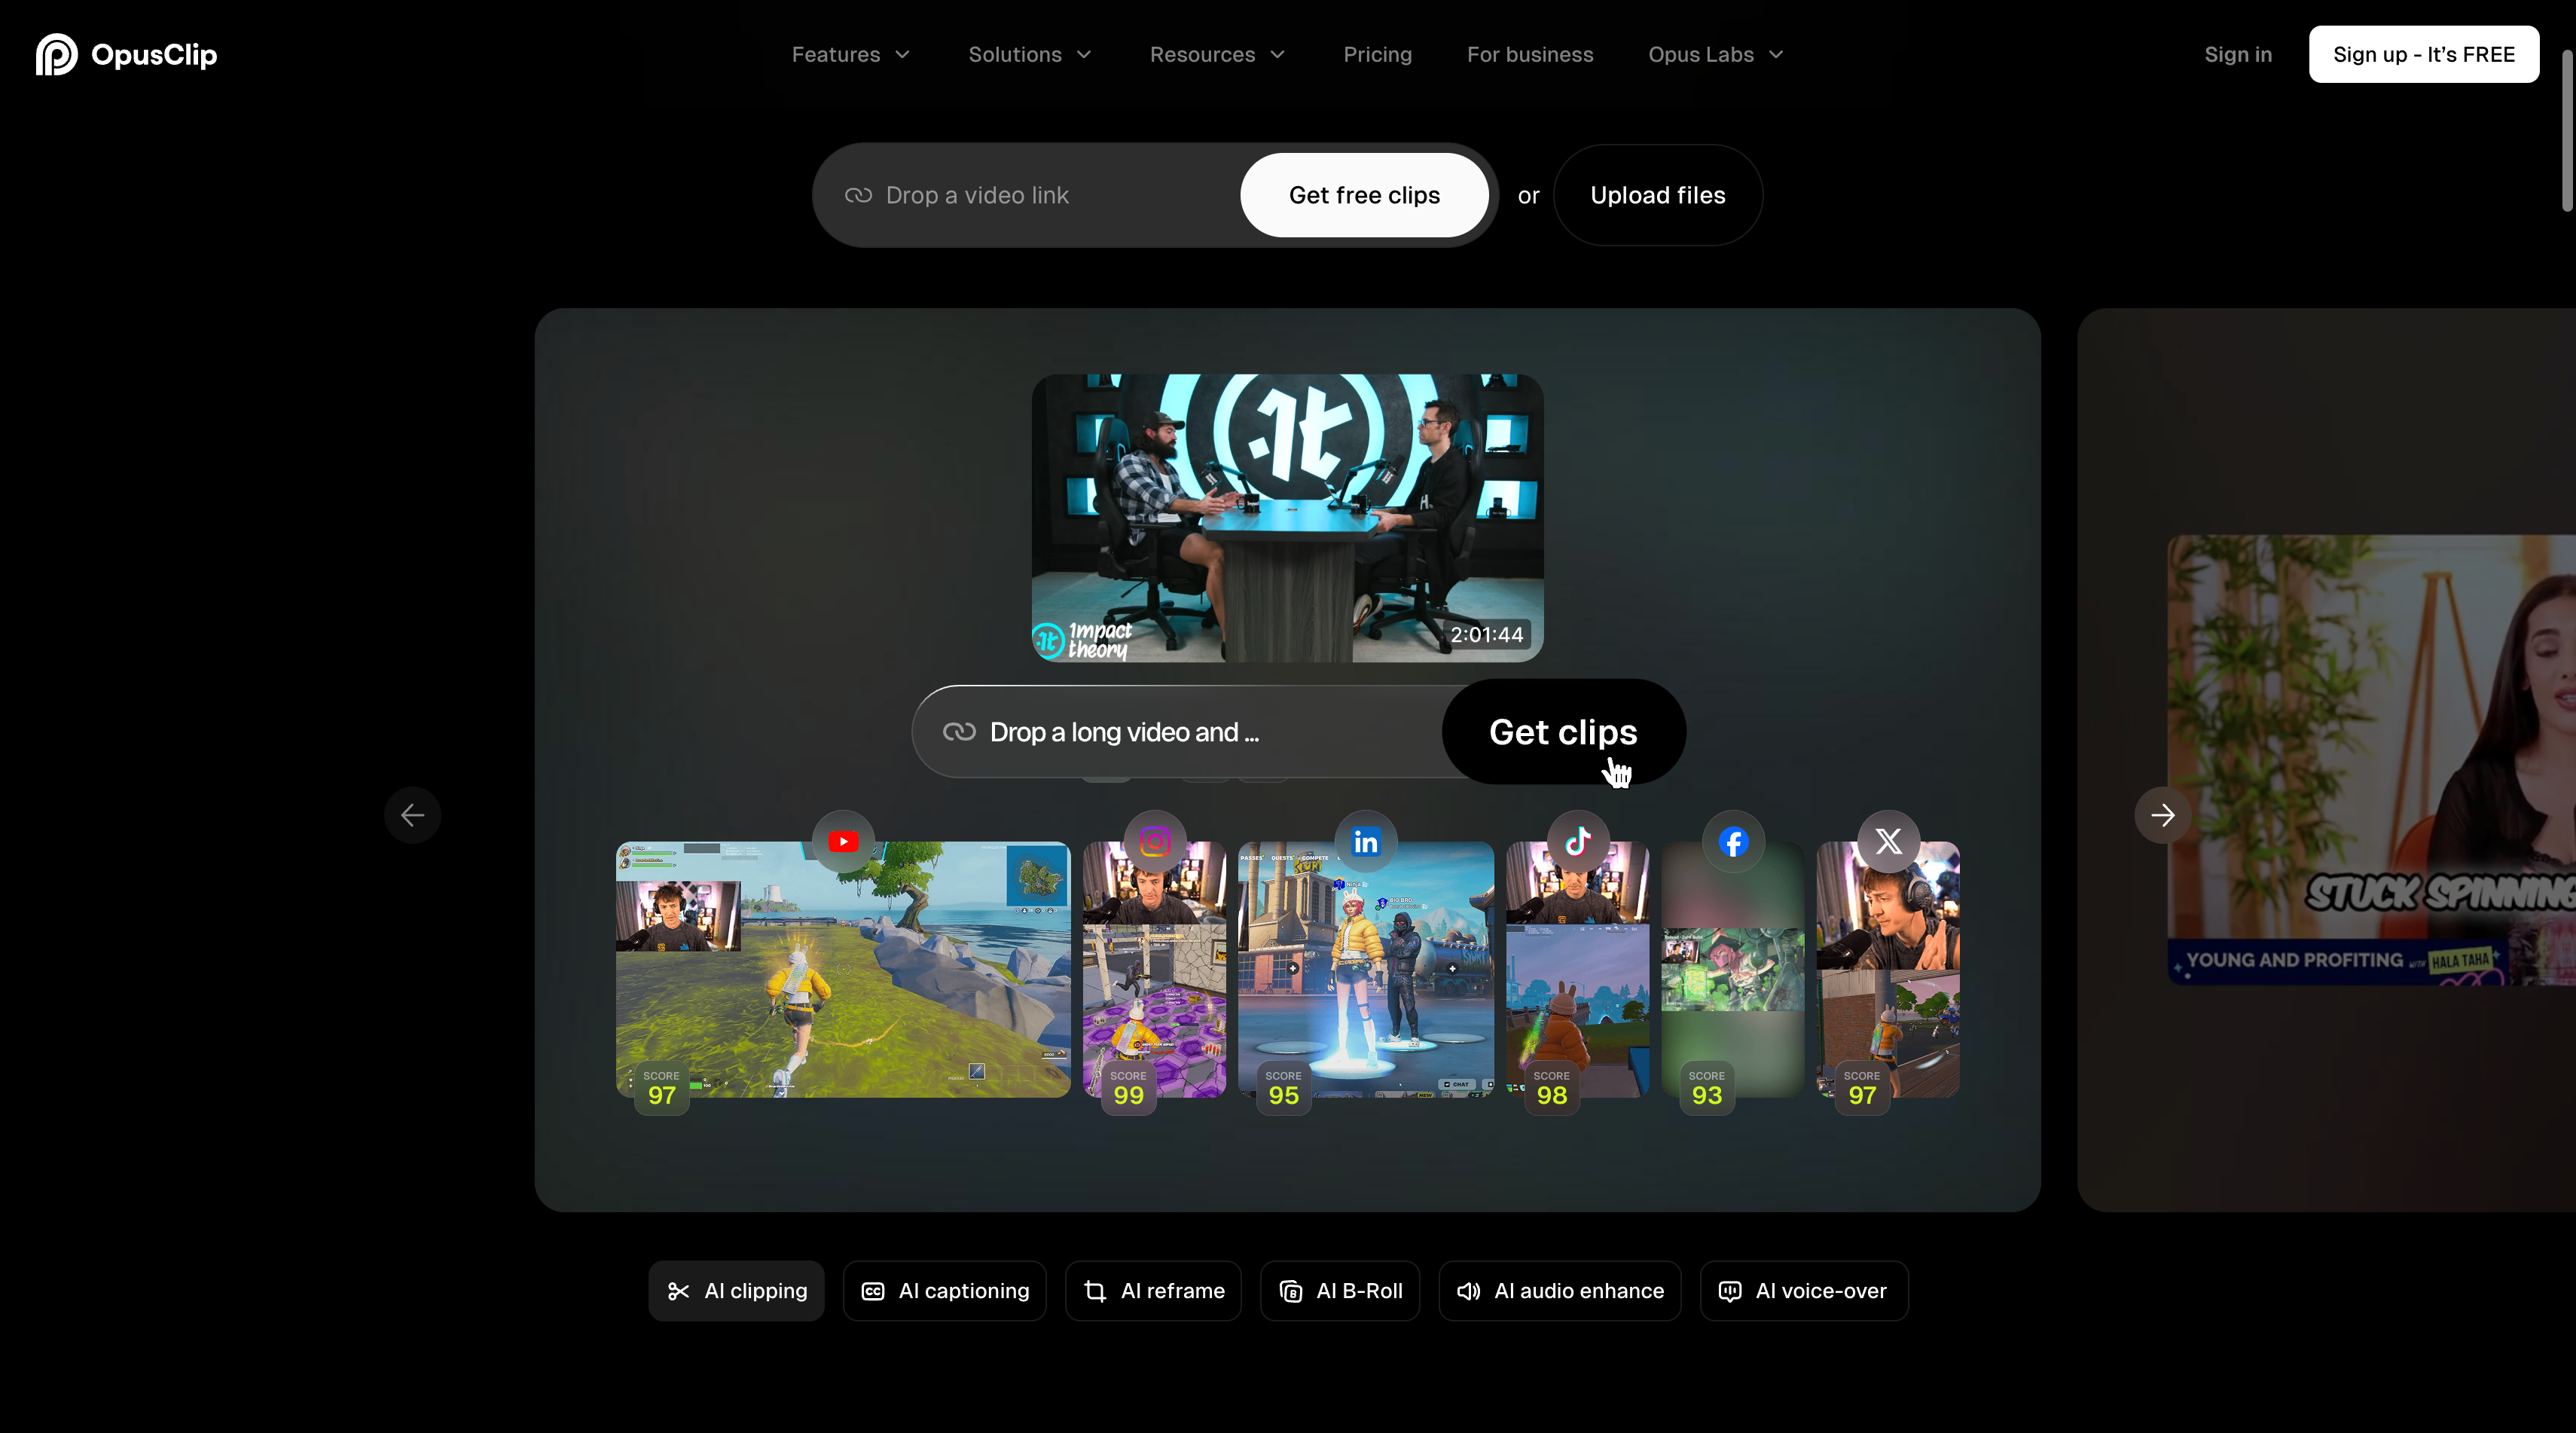
OpusClip’s core workflow is long video to short clips. You provide a video link or upload a file, the system finds candidate moments, and you review suggested clips with scores, captions, reframing, and platform outputs. Its current product material also describes prompt based features such as ClipAnything and an AI that edits with you. That adds an agent like instruction layer, but the main job remains finding and packaging moments from an existing episode. The working path is drop a link or upload the long video, choose a clip goal or prompt, review scored candidates, adjust captions or reframing, and export the social versions.
This overlaps with ChatCut when the request is “find the strongest moments and make social clips.” Both can start from a goal rather than a list of timestamps, and both give you an AI first pass that should be reviewed. The boundary is the project being edited. OpusClip is optimized for a distribution pass from a finished long video. ChatCut is designed to keep the episode project available while you correct the transcript, adjust the timeline and tracks, add captions or other media, and make a different deliverable from the same source. Choose OpusClip when clip discovery and volume are the bottleneck. Choose ChatCut when the original episode still needs editorial work before the clips are ready. To try the latter workflow, follow the guide to turning a long video into short clips, including selecting moments, reframing speakers, and reviewing captions.
OpusClip homepage capture. The visible workflow is “Drop a video link” or upload files, then get clips. The hero shows scored examples and controls for clipping, captions, reframing, B roll, audio enhancement, and voice over. The image illustrates the repurposing workflow, not a matched benchmark against ChatCut.
The useful comparison is therefore not “which tool has AI.” All six have an automated or instruction based layer. Ask where your work starts, what the first result contains, which parts remain editable, and whether you need the original multitrack episode after the clips are made. Those answers will usually narrow the choice faster than a list of feature names.
Check the tracks and camera decisions your show cannot lose
If one guest is too quiet or two people speak at once, you need access to the right recording. Check for separate audio tracks before assuming a transcript’s speaker labels will let you change each microphone.
A transcript label helps you read who spoke. An audio track lets you change a microphone’s level independently. Synchronization aligns recordings in time. Camera switching chooses which picture appears in the edit. One feature does not imply the others.
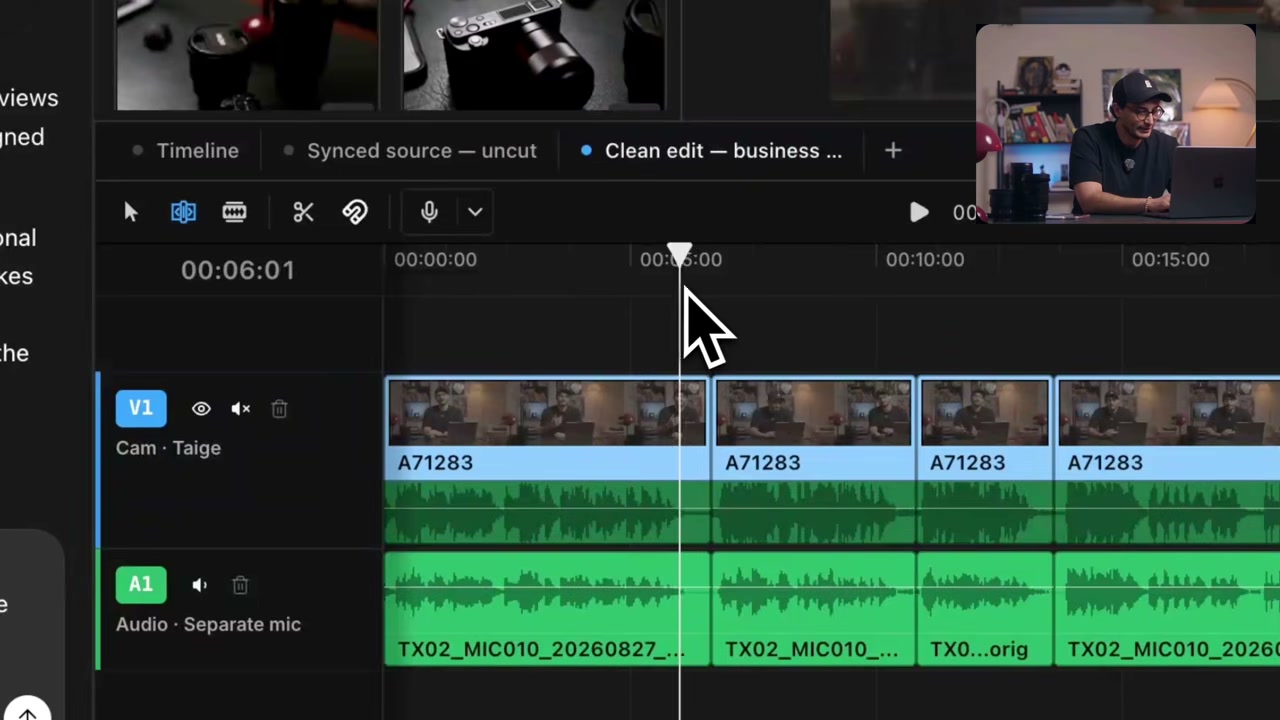
At 5:35 in the published tutorial, Cam · Taige and Audio · Separate mic occupy distinct tracks. Compare their segment boundaries around the playhead, then listen to the same phrase on both. Separate tracks make this check possible; their presence alone does not establish sync.
Test a restoration as well as a deletion. Returning a phrase to the video while leaving a separate microphone unchanged can create a problem that was absent from the first cut. Listen and inspect the result at both ends of the revised range.
Compare the handoff, not a feature checklist
List the full video, audio episode, subtitles, transcript, social clips, and editable handoff before choosing a plan. Test the actual required output from a short project.
Decide whether you are delivering video as well as audio before choosing the plan. In February 2025, YouTube reported more than one billion monthly active viewers of podcast content. That is YouTube’s platform figure, not your potential audience or an editor quality score. It makes video layouts, camera review, and separate audio delivery worth considering even when the show began as an audio podcast.
ChatCut documents video, audio, and subtitle exports as well as XML exports. Its XML can omit captions, effects, transitions, and other unsupported items. An imported timeline needs inspection and may need media relinking. Equivalent handoff claims in another product should be checked against that product’s current plan and format documentation.
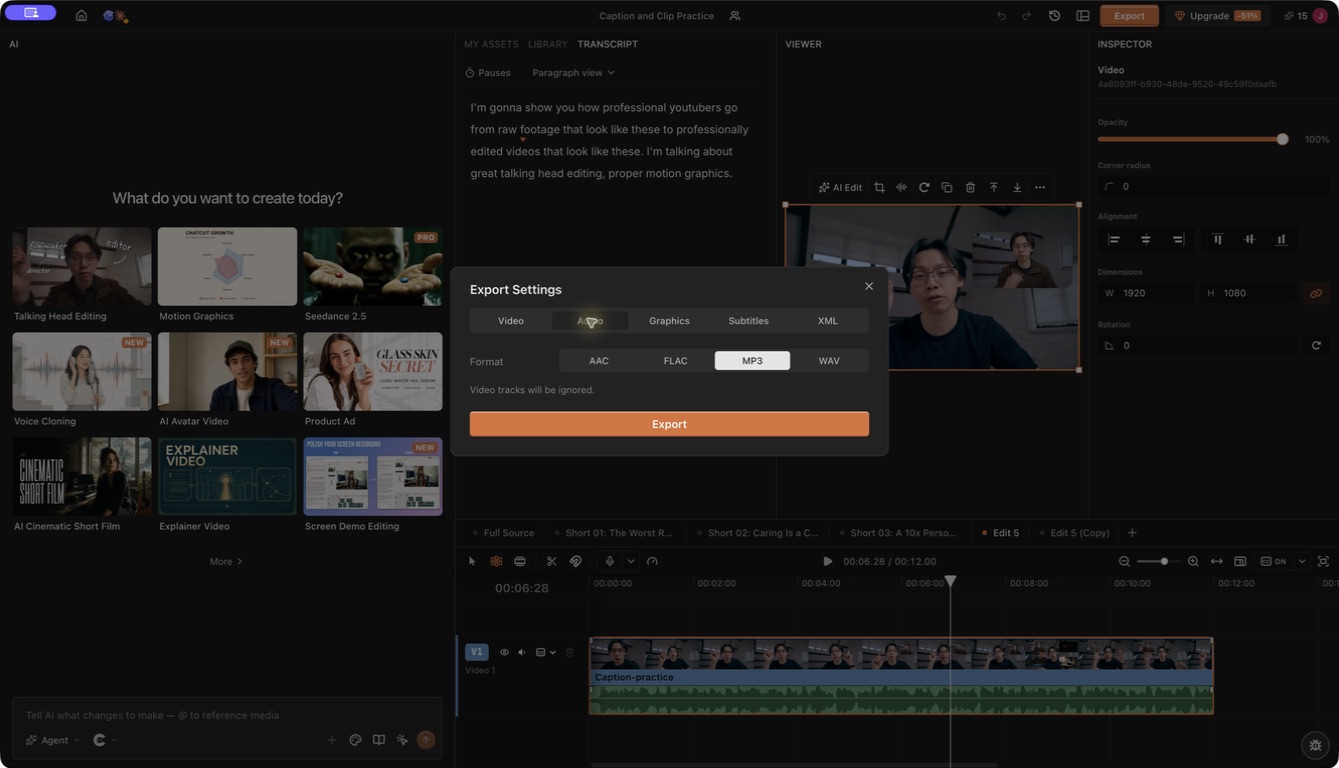
Try the delivery you actually need: open Export → Audio and choose the format required by your podcast host. Use the Video tab for the filmed episode and clips. Play both files to check that they contain the intended edit and mix.
Frequently asked questions
Which AI podcast editor should I choose for my workflow?
Start with where the work begins. Riverside fits a recording first workflow with separate guest tracks. Descript fits a transcript first workflow. FireCut fits a team already working inside Premiere Pro or DaVinci Resolve. Wisecut fits an automated speech cleanup pass. OpusClip fits turning a finished long video into social clips. ChatCut fits an imported project that still needs natural language changes, transcript edits, track level corrections, or several editable deliverables. Compare two suitable candidates on the same difficult passage.
Do speaker labels let me change each microphone separately?
Speaker labels identify text, but independent microphone control requires the relevant separate recordings or tracks. Import a sample and test one quiet voice or overlapping exchange. A mixed file does not necessarily provide the control available from separately recorded microphones.
Does multicam sync automatically choose the best camera?
ChatCut’s multicam sync aligns recordings using recognizable overlapping audio and places or moves them on separate tracks. Camera selection is a separate editing decision. Check alignment with a clear phrase or clap, then review the chosen picture through speaker changes.
Should I export audio, video, or separate podcast clips?
List the destinations before choosing a plan. You may need a full audio episode, filmed episode, subtitles, social clips, and an editable project. Test those exact outputs on a short sequence and play the files. Inspect any XML handoff for missing elements and media that needs relinking.
How do I compare podcast editing plans fairly?
Count source hours, seats, AI actions, and rendered outputs using each plan’s actual quota unit. Four 60 minute episodes plus three one minute clips per episode produce 252 minutes of video delivery before revisions. That workload is different from four hours of uploaded source.
Which option works without Premiere Pro?
ChatCut, Descript, Riverside, Wisecut, and OpusClip provide their own editing workflows. FireCut is the host dependent option in this list and also offers a DaVinci Resolve integration.
How does OpusClip differ from a full podcast editor?
OpusClip starts with a finished long video and finds moments to package as short clips. A full podcast editor keeps the episode project available for transcript changes, track corrections, camera decisions, and new exports. Use OpusClip when clip discovery is the bottleneck. Use ChatCut when the episode still needs editorial work before you publish its clips.
Can an AI editor finish a two hour interview unattended?
It can produce a first pass, but someone must judge context, omitted qualifications, pacing, picture, and sound. Check the complete episode and actual exports before publishing.
Which free option should I try?
Try the plan that permits your representative sample and required output. ChatCut’s Free guide separates core editing, starter credits, paid capabilities, and cloud rendering allowance. Check comparable limits directly for the other candidates.
Do these tools work in every language?
Language support and recognition quality differ. Test names, specialist vocabulary, overlapping speech, and captions in the language of your show before processing the entire recording.
Choose the editor that protects your hardest podcast handoff
Decide whether your next delivery is a full episode, a multicam interview, an audio only file, or several clips. Test that exact handoff with a real interruption and the tracks you normally use. ChatCut is a useful route when you want transcript and agent instructions to produce an editable timeline you can inspect; another tool may fit better when its recording or distribution workflow is the part you repeat most.
Before paying, play the result, check speaker labels and camera choices, and confirm the export or transfer your team needs. A plan comparison becomes meaningful only after the source, review standard, and final deliverable are the same.
SEO title: Best Gaming Video Editing Software for Montages and YouTube Clips Meta description: Gaming montages and YouTube walkthroughs need different editing controls. This software guide covers timing, separate audio tracks, and a test with your own gameplay.
Gaming Video Editing Software for Montages and YouTube Videos
Quick summary
The best gaming video editor depends on the montage you want to publish. A beat driven highlight reel needs different control from a long YouTube walkthrough. Keep the setup and payoff of each play, test the editor with your own gameplay and audio tracks, and check the export at the frame rate your footage uses.
A gaming montage is not a pile of kills cut to music. The viewer needs to understand the setup, see why the moment matters, and feel the payoff before the next clip starts. That is why a tool that finds highlights quickly may still be a poor fit when you need to protect game sound, microphone audio, or a specific rhythm.
For a first test, use a short gameplay recording with one complete play, a separate voice or game track, and a song you can legally use. In ChatCut, open a new timeline, name the moments and their order, and ask for a cut such as, “Keep the setup before each overtake, place the payoff on the beat, preserve game audio, and leave the timeline editable.” Play the result before you compare editors by a feature list.
Choose the montage you actually want to finish
For a first montage on a desktop, start with DaVinci Resolve. Its free edition combines editing, color, effects, and audio in one application. Choose another option when its particular workflow fits your project better.
What you want to make
Start with
Why it fits
Check before committing
A montage with precise cuts, effects, and a detailed sound mix
Keep a visible timeline while directing clip order, timing, speed, and sound changes
Use precise source ranges and review the result. Check your plan for the export you need.
There is a concrete reason to try Resolve Free before buying Studio: Blackmagic says the free edition handles virtually all 8 bit video formats at up to 60 fps and 3840 × 2160. That covers the resolution and frame rate of many gameplay projects, provided the source codec is supported. It does not mean every 10 bit recording or AI feature is included.
For CapCut, the relevant feature is the speed curve. It lets the playback rate change within a clip. A constant 2× speed change, used later in this tutorial, is a simpler operation. Choose based on the movement you need to shape.
Vegas Pro, Filmora, and PowerDirector are also worth keeping if you already edit comfortably in one. Switching tools makes sense when you can name a missing capability, such as a particular speed curve, an audio workflow, or project compatibility with an editor you work with.
Match the tool to the channel’s repeated job
Premiere Pro and DaVinci Resolve both appear in published gaming creator tutorials. Here are two specific examples you can learn from:
A gaming montage workflow described for Fortnite, Call of Duty, and other games. The description also lists optional presets and a paid editing pack.
These are dated examples of creators teaching a workflow. They do not establish which editor most YouTubers use or what either creator uses for every current project. An optional creator pack is also separate from the price of the editor.
Use the example closest to your format. A commentary video puts more weight on pacing, readable subtitles, and reactions. A music driven montage needs closer control over the timing of the action and sound. For a broader comparison across video formats, see what editing software YouTubers use.
Build and inspect one real sequence
Start with three or four moments that are understandable on their own. Keep the approach, the decisive move, and enough of the result to show why it matters. For a shooter, that might be the target appearing, the shot, and the confirmed hit. For a racing game, it might be the approach to a bend, the turn, and the exit.
The practice below uses SuperTuxKart racing footage and a simple 120 BPM percussion track. A 65 second source recording becomes a 16 second sequence with four shots. Both the source file and the finished export are 1920 × 1080 at 60 fps. These timings are practice choices, not a recommended length for every montage or a ChatCut preset.
1. Import gameplay and keep a source timeline
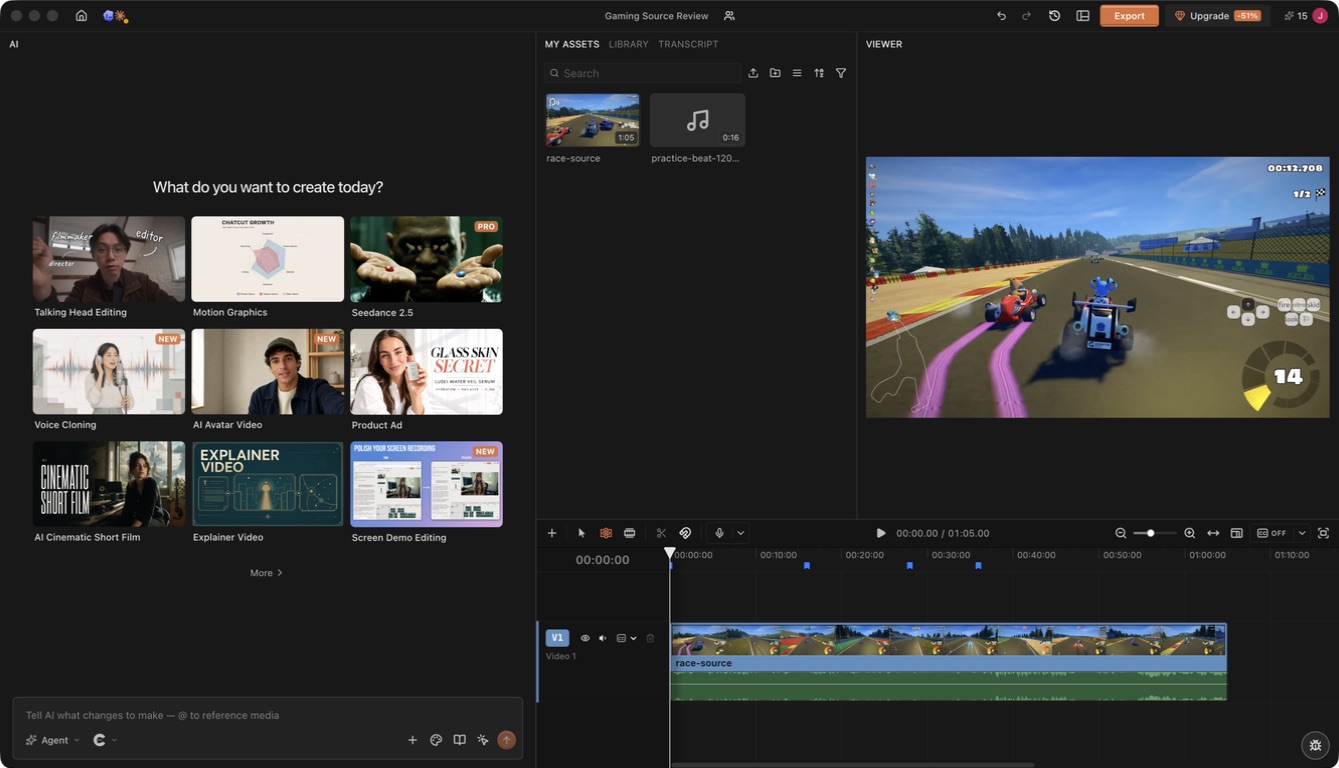
In ChatCut Desktop, use Import in My Assets to add your gameplay and music. Place the gameplay on a timeline named Source. Keep that version intact, then create a second timeline for the montage. With an OBS recording, prepare the file and audio tracks first if import fails or your microphone needs a separate mix.
My Assets holds the gameplay and percussion files. The source version keeps the full 65 second recording available while the montage uses selected ranges. Blue markers identify the moments chosen for the exercise.
Watch the recording for complete actions. Put a marker near a moment you might use, and give it a note that explains the action. ChatCut's timeline guide explains where to find the marker shortcut under Avatar → Keyboard shortcuts → Markers. A marker is a note and navigation point; it does not cut the clip.
2. Keep the setup and payoff when you select clips
Moment
Range in race-source.mp4
Speed
Position in the montage
Establish the pack of racers
0 to 4 seconds
1×
0 to 4 seconds
Move along the straight
16 to 24 seconds
2×
4 to 8 seconds
Boost past another kart
28 to 32 seconds
1×
8 to 12 seconds
Enter the corner and show the exit
36 to 40 seconds
1×
12 to 16 seconds
The times in the table belong to the downloadable excerpt, not the race clock visible in the game. Use these ranges for the practice clip, or choose equivalent moments in your own recording. Play each selection without music first. If the action starts halfway through a move, extend the beginning. If the cut hides the result, extend the end before trying to fit it to a beat.
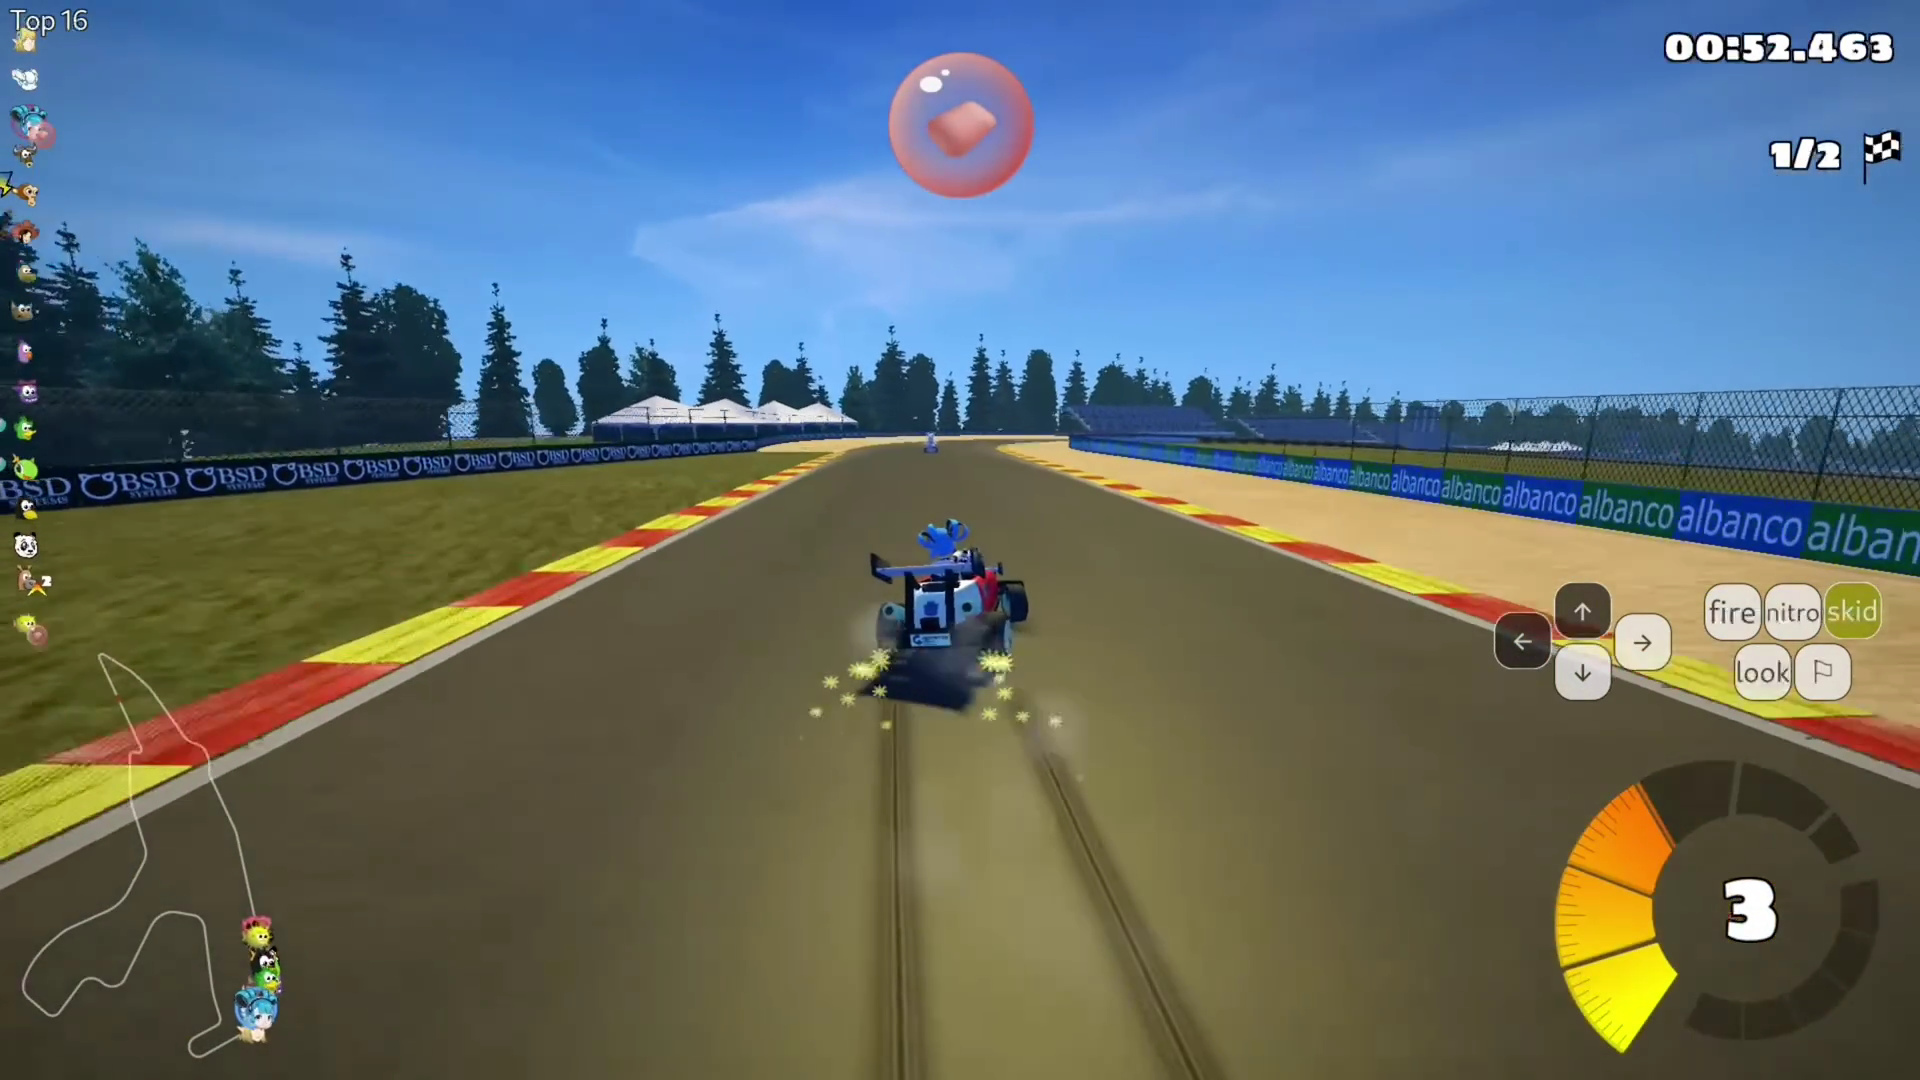
The first edit used 34 to 38 seconds for the final shot and stopped while the corner was still unfolding. Moving that selection to 36 to 40 seconds preserves the turn and shows the position changing from fourth to third. That visible result is the payoff to keep.
The revised ending keeps the result visible. The position indicator at the lower right now reads 3. Frame taken at 15.8 seconds in the final export.
A useful instruction gives ChatCut the source, ranges, order, and outcome. For this practice:
In the Montage timeline, use race-source.mp4 in this order: 0 to 4 seconds at normal speed, 16 to 24 seconds at 2× speed, 28 to 32 seconds at normal speed, and 36 to 40 seconds at normal speed. Place them without gaps. Put practice-beat-120bpm.wav underneath from the start. Keep the full game frame and HUD visible.
After the edit appears, check each clip against the table and play across every join. The ranges in this exercise were chosen from the recording; check your own selections the same way.
3. Put important moments on the music
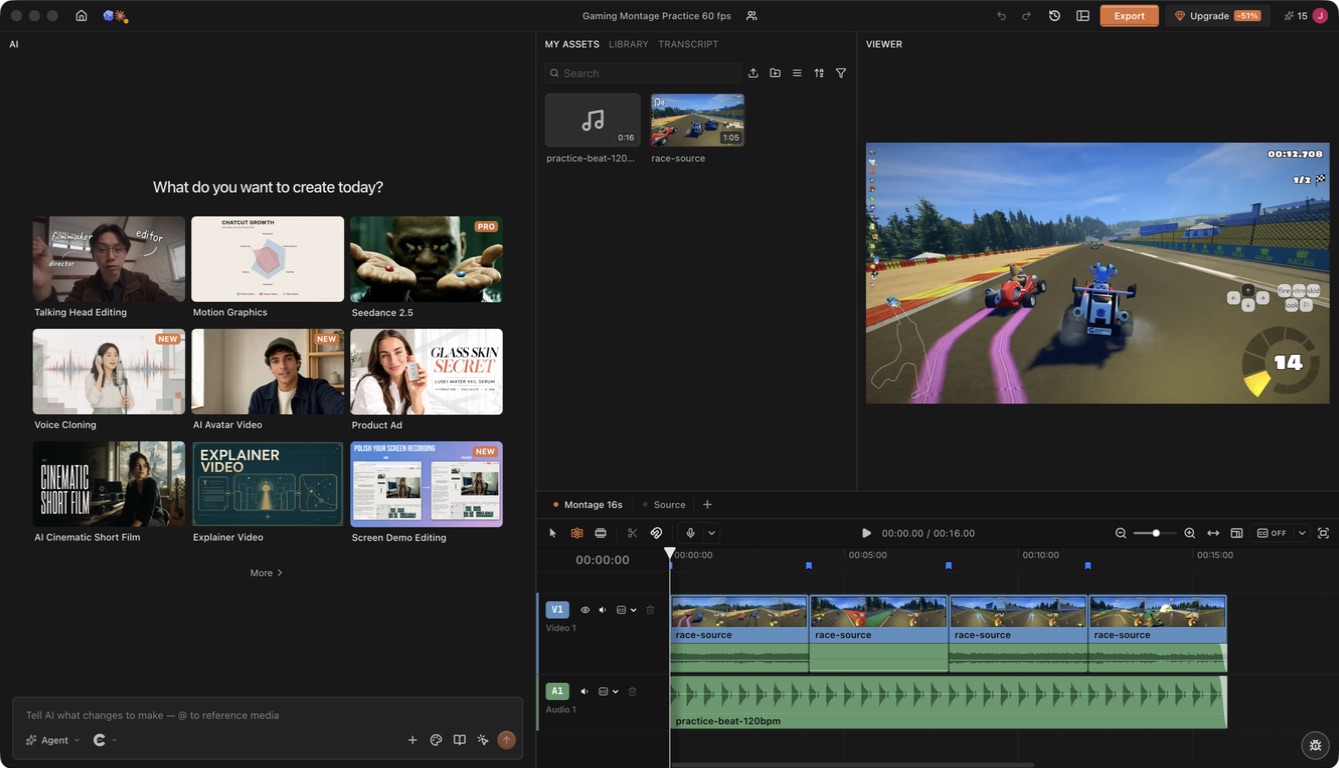
At 120 BPM, a beat lasts half a second: 60 ÷ 120 = 0.5. A four beat bar lasts two seconds. In this exercise, the larger cuts fall on four second boundaries, giving each shot two bars. You can use this as a starting grid, then adjust when the action needs more space.
V1 contains the four gameplay selections; A1 contains the percussion. The blue markers above the clips correspond to 0, 4, 8, and 12 seconds. Compare the 16 second duration above the timeline with the 1:05 source asset. Open the image to inspect the original pixels.
The useful synchronization point can be the payoff inside a shot. If the hit occurs one second after a clip begins, position the clip so that hit meets the chosen beat. Cutting to the clip on the beat would place the hit a second late. Keep listening across the join and preserve the action's setup.
This example uses deliberately placed edits and markers. It does not rely on automatic beat detection or automatic kill recognition.
4. Use speed to shorten the approach
The second shot uses eight seconds of source footage, from 16 to 24 seconds, played at 2× speed. It occupies four seconds in the montage. The later boost and corner remain at normal speed so the viewer can follow the passing move.
For a manual change, right click the clip and choose Speed, as documented in ChatCut's timeline controls. Return to normal speed where viewers need to read the action. Preview across both ends of the change and check the clip duration afterward.
If your main creative goal is a smooth acceleration into a hit followed by slow motion, choose an editor with the curve controls you want. The constant speed segment shown here demonstrates a smaller, specific operation.
5. Balance music and game sound
Place the music on its own audio track. Keep the useful game sounds audible: a hit, engine change, crowd reaction, or spoken reaction can make the moment easier to follow. Lower the music around those sounds and use a short fade at the end so it does not stop abruptly.
For this exercise, the percussion is set to minus 6 dB. The source recording has a single mixed audio stream, set to minus 18 dB on the normal speed clips and muted on the accelerated clip. The final clip and percussion have a 0.25 second audio fade. These values demonstrate separate control; adjust them for your own recording and music.
When commentary matters, use separate microphone and game tracks. A single mixed recording gives you less control: reducing the music already inside that recording also reduces the game effects. For speech selection in ChatCut, use Transcript, then review the matching gameplay before removing a passage.
6. Export and watch the finished montage
Use Export → Video, choose the intended resolution and frame rate, and play the saved file. In this practice, ChatCut Desktop produced a 16 second H.264 MP4 with AAC audio at 1080p and 60 fps.
The exported practice montage. The straight is accelerated from 4 to 8 seconds; the final shot includes the corner and the resulting position. This is an editing exercise using selected source ranges.
Review three things: can you understand the action before each cut, can you hear the sound that matters, and is the HUD still readable? If an effect makes any of those worse, remove or simplify it. A montage with clear timing is already a complete result.
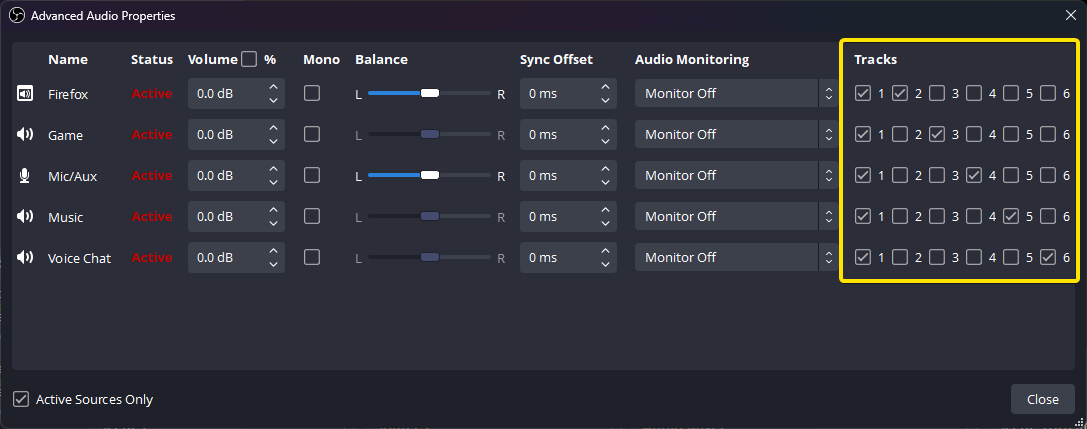
Recording choices determine what you can fix later. For PC gameplay in OBS, open Advanced Audio Properties and route game sound and microphone audio to separate tracks. Keep a complete mix on track 1 if you want a convenient playback copy.
The official OBS example assigns Game to track 3 and Mic/Aux to track 4, while both also feed track 1. The yellow outline is part of the original guide image. Use assignments that match your own sources.
Next, enable the same track numbers under Settings → Output for the recording. Otherwise, a source can be routed to a track that never reaches the saved file. Record a short exchange and check the isolated tracks in your editor. Avoid playing the complete mix and all isolated tracks together, which doubles the sound.
OBS recommends MKV because an interrupted recording need not corrupt the whole file. If your editor needs MP4, choose File → Remux Recordings, select the MKV source and MP4 destination, then run Remux. This changes the container without reencoding the picture. It does not fix an unsupported codec inside the file.
For PS5 footage, copy a saved gameplay clip to the computer and inspect its resolution, frame rate, and color format before selecting an editor. Import one representative file first. If it is HDR, decide whether the finished montage will stay HDR or be converted for SDR viewing; the editor needs to support that path. The console name alone does not establish codec compatibility.
Protect gameplay, faces, captions, and HUD details
Finish the horizontal montage first when the full game screen is important. A 16:9 composition can preserve the minimap, score, crosshair, and opponents around the edge of the frame.
For a Short, make a separate 9:16 timeline and adjust the composition around the event. Check the whole shot: a centered crop may show the player but lose the opponent they are reacting to. Where both sides matter, keep the relevant gameplay area together and use the remaining space for a separate face camera or captions. Keep labels away from the HUD.
Use a short title or motion graphic only when it adds context, such as the map or challenge. Generated artwork can work for an intro, but a clip teaching or demonstrating a play needs the actual gameplay. For a longer source, the guide to turning videos into Shorts covers separate versions and local revisions.
For YouTube uploads, YouTube recommends the recording's frame rate. Its SDR 1080p guidance lists 8 Mbps at standard frame rates such as 30 fps and 12 Mbps at high frame rates such as 60 fps. These are upload recommendations, not a guarantee of sharp fast motion or a ChatCut bitrate setting. Keep a 60 fps source at 60 fps when that is your intended delivery, then inspect motion and small HUD text in the exported file.
Frequently asked questions
What is the best free software for gaming montages?
Start with DaVinci Resolve if you want a complete desktop workflow for cutting, sound, color, and effects. Check your source codec against its free edition. Shotcut is another free option on Windows, macOS, and Linux, with documented markers, speed changes, and keyframes. CapCut is useful for speed curves, but check the paid status of the specific features and assets in your project.
What do gaming YouTubers use to edit their videos?
There is no single editor established by the examples in this guide. JamFam published a Premiere Pro gaming tutorial in August 2024, while Joshyy published a Resolve montage tutorial in April 2025. Learn from the creator whose format resembles yours, and treat those dates as the evidence for the examples.
How do I make a gaming montage that matches the music?
Choose complete actions, then place the important visual moment on a beat or musical change. At 120 BPM, beats are half a second apart. Use markers as timing notes and trim around them. Keep enough setup to understand each move; a cut on every beat can make the play hard to follow.
Do I need After Effects for a gaming montage?
You can complete cuts, clip timing, sound, and a finished export in an editor such as Resolve or Premiere Pro. Add After Effects when you have a specific animation or compositing job that needs it, or a collaborator's existing project. Ordinary montage assembly does not require buying a second application first.
Which software should I use for PS5 gameplay?
Start with the same montage shortlist, then test a file captured with your actual PS5 settings. Resolution, frame rate, codec, and HDR handling matter more than the console label. Confirm import and a short export before committing to a whole session.
How do I edit an OBS recording with separate game and mic audio?
Assign game and microphone to different tracks in OBS Advanced Audio Properties, then enable those tracks in Settings → Output. Check them separately in the editor. If the editor needs MP4, use OBS File → Remux Recordings and verify that the remuxed file retains the tracks you need.
Should I export a gaming montage at 30 or 60 fps?
Use the recorded frame rate when it matches the intended delivery. Preserve 60 fps gameplay for a 60 fps montage. Changing a 30 fps recording to a 60 fps export does not by itself add new captured motion. Check the saved file's frame rate and watch fast movement before uploading.
Can ChatCut automatically find kills and cut to the beat?
The workflow demonstrated here uses selected source ranges, timeline edits, and manually placed timing markers. It does not establish automatic kill recognition or beat detection. You can direct and revise those edits through instructions, then inspect the actual game action and music together.
Which gaming editor works best on a slower computer?
Use proxy files or reduced preview resolution where the editor supports them. Shotcut documents both proxies and preview scaling. Try the effects you actually need on a short recording, then compare playback and exported quality. This guide has no hardware benchmark establishing one editor as the fastest.
Choose gaming software by the moment you need to protect
Decide whether the job is a beat driven montage, a longer gameplay episode, or a vertical highlight. Test a real recording with its game and microphone tracks, keep the setup and payoff of each moment, and inspect the export at the destination frame rate. In ChatCut, name the source ranges and desired rhythm, then review the editable timeline and audio before you repeat the cut.
The software a YouTuber uses is useful context, not a guarantee that it fits your computer or footage. Keep the original recording, confirm the music rights, and watch the final file before publishing.
SEO title: The Best ChatGPT Plugins for Video and Creative Work Meta description: The best ChatGPT plugin returns the file or editable change you asked for. Match the connection to a specific creative handoff, then test one small request in the right host before you automate it.
The Best ChatGPT Plugins for Video and Creative Work
Quick summary
The best ChatGPT plugin is the one that returns the file or editable change you need. Start with the creative handoff, test one small request in the correct host, and verify the saved result, permissions, and cost before connecting more services. ChatCut is the video route when you want an editable timeline from a natural language request.
People usually search for ChatGPT plugins after a specific task has become tedious: a recording needs a usable cut, a design needs a revision, or an approved draft must reach another workspace. A long list of app names does not answer that problem. The useful comparison is what each connection can change, where it saves the result, and what you still need to review.
For video, open a ChatGPT desktop task with ChatCut installed, attach a short recording, and ask for one change with a clear boundary: “Remove the repeated take from the introduction, add captions, and leave the timeline editable.” The returned project gives you something to inspect in the editor. Use that small handoff to confirm the host, permissions, and output before you connect a design, document, or publishing service.
Start with the result you need back
Name the file or draft you want back, then find the matching task below. Before connecting an account, confirm the host and action listed by that provider.
Task
Candidate
Connection detail to check
Edit recorded video
ChatCut
Agent Plugin in the ChatGPT or Codex desktop app
Work with Canva designs
Canva AI Connector
Use the design connector, not Canva’s developer documentation server
Use or modify Figma content
Figma MCP
Supported client, available tools, and write workflow
Read and revise workspace content
Notion MCP
OAuth access and the pages available to your account
Generate or process voice audio
ElevenLabs
Current hosted MCP route and supported tools
Connect an agent to another business app
Zapier MCP
The selected actions and their destination accounts
Work with a website
WordPress.com MCP
Eligible site and plan, connection, and specific enabled tools
These are workflow candidates, not a claim that all seven appear in one universal ChatGPT plugin store or share an installation path. Use each provider’s current instructions for the app you have.
Installation varies by provider. ChatCut provides the setup prompt below for a desktop task. For the other connections, follow the linked provider instructions and confirm that your app supports the action you need.
What each connection can change in its own workspace
Start with the source you already have: a video recording, design file, brief, or site draft. The following connections give you different ways to work on it.
ChatCut for an editable video
ChatCut’s plugin lets you describe a video edit in ChatGPT and review the result on an editable timeline. It can cut footage, add captions, create motion graphics, generate media, and export the finished video. In a task in the ChatGPT desktop app, paste this official installation prompt:
Installation prompt
/goal Read chatcut.io/chatgpt to install the ChatCut plugin and set up a new task for me.
Complete sign in when the authorization page opens, then continue in the new editing task the installer creates. Attach a short recording and ask, for example: “Use ChatCut to remove the repeated take and add captions. Keep the timeline editable.” Open the returned project, play the cut, and ask for a correction if it removes something you wanted to keep. The guide to editing video with ChatGPT walks through the first edit and export. The same setup prompt also works in the Codex desktop app.
Use the Canva AI Connector when your task concerns a Canva design. Canva’s Dev MCP documentation explicitly directs design users to that connector; the Dev server assists with building apps and integrations.
This distinction prevents a common setup mistake: a server that provides development documentation is not automatically the connection that creates a social graphic in your workspace. Verify the design actions and account features you need, including any Brand Kit or premium asset entitlement.
Figma for design context and canvas work
Figma’s current MCP introduction describes reading design context and writing native content to the canvas through supported clients. It recommends the remote server and relevant skills for write workflows.
Use it when the design file, components, or layout are the source of the work. Check the client listed by Figma and the exact operation you need. Do not transfer the limits of a separate FigJam or Slides app to every Figma connection.
Notion for briefs and editorial content
Notion MCP connects a supported MCP client to content your account can access. Its current documentation lists search, reading, creation, and updates, including pages and databases.
Start with a specific brief or page. Ask for a proposed revision and inspect it before updating shared content. If the tool cannot access the page, check the authorized account and workspace controls before assuming that connecting Notion exposes the entire organization.
Check the current tool list and plan before selecting narration, transcription, or another audio operation. Preview the actual output and pronunciation. Access to a voice service does not establish a right to clone any person’s voice or a quality ranking against other providers.
Zapier for a specific action in another app
Zapier MCP connects supported agents to actions in connected apps. Choose the accounts and actions needed for your workflow, then try a small task whose result you can inspect.
For example, saving an approved draft to a designated workspace is a different action from publishing it or sending it to a team. State the intended destination and whether the output is a draft. A successful connection does not mean every available action should run automatically.
WordPress.com for site content
WordPress.com’s MCP guide documents its connection routes, eligibility, and enabled tools. It lists ChatGPT and Codex separately, so use the setup for your actual client.
Current documentation covers paid WordPress.com plans, a limited initial period for free sites, and eligible Jetpack connected sites. Check your site’s eligibility before setting up the connection.
Begin with a draft and inspect formatting, links, images, and metadata in the site. Give an explicit publish instruction only after the draft is ready and publication is intended.
Make the first request small enough to check
Name the saved result, not just the service. Ask a design connection to create an editable draft from one approved brief. Ask a document connection to revise one named draft page. Ask ChatCut to import one named recording, remove one repeated take, and leave the timeline available for review.
If your problem is repeating the same video process each week, the next step is saving and reusing that editing workflow. A connection supplies editing actions; a saved Skill supplies instructions for how to use them on the next source.
Verify the next handoff before you automate it
Keep these candidates on the list when they match your workflow, but verify the specific connector before depending on an action. Reading a Drive document, writing a new document, searching Slack, posting to Slack, and generating a video are separate capabilities.
Inspect the current listing and available actions in your account, then check the provider documentation for the operation you need. Confirm the destination and granted permissions with one draft before applying a workflow to a larger set of files.
Likewise, a packaged creative or analytics workflow can combine instructions and several connections. Its name does not establish which subscriptions, accounts, or write actions are included. Choose it for a concrete deliverable and inspect the tools it uses.
Inspect the file, access, and billing route
Open the saved result and compare it with your request. Check the intended file, page, or project changed and that you can make the next revision you need.
For video, inspect the editable timeline and actual export. For a design, open the saved file and check the elements you need to revise. For a document or website, confirm that the intended draft changed and that the result was not published unintentionally.
Keep billing routes separate. Your assistant subscription, the connected service’s plan, generation usage, and automation actions can have different costs. Read the current estimate or entitlement at the point where it affects the task.
Frequently asked questions
How do I choose the right ChatGPT connection for my task?
Name the result first: an editable video, a design draft, a document change, or another saved output. Check which provider exposes that action in the host you use. Test one small task and inspect its destination before connecting more services.
Are ChatGPT plugins and connected apps free?
Costs can come from the assistant subscription, the connected service’s plan, generated media, or metered automation actions. An installed connection does not make every action free. Check the entitlement and estimate for the output you actually need.
Are apps, plugins, skills, and Custom GPTs interchangeable?
No. Follow the setup instructions for the product and host you are using. A service connection supplies supported actions within your permissions; a Skill can supply reusable instructions for those actions. Check the current tool availability before assuming a saved instruction can change an external file.
Where do I install the ChatCut video editing plugin?
Use a task in the ChatGPT desktop app on Mac or Windows, then paste the installation prompt above. Complete sign in and continue in the new editing task. The prompt also supports the Codex desktop app; installation requires a desktop task and is unavailable in ChatGPT on the web or mobile.
Can I create a draft without publishing it?
Specify the destination and draft state in the request, and check that the connection supports them. For video, ask for an editable project and review it before export or distribution. For a page or document, open the saved draft to confirm its location and status.
Does an MCP server expose a product’s complete API?
No. The assistant can use the tools the connection actually exposes and the permissions your account grants. MCP is a connection standard, not a guarantee of unrestricted access.
Do I need to connect my whole production stack at once?
No. Finish one small recurring task with one connection first. Add another when it solves the next real handoff.
Choose a ChatGPT connection by the result it can return
Name the file, draft, or editable project you need before you connect an app. Test one small request in the host the provider supports, inspect what changed, and check permissions and billing while the task is still easy to undo. For video, ChatCut lets you describe a bounded edit and review the editable timeline before export.
Add another connection only when it handles the next real handoff. A protocol name or app listing does not prove that the operation you need is available, that the destination is a draft, or that the result is ready to publish.